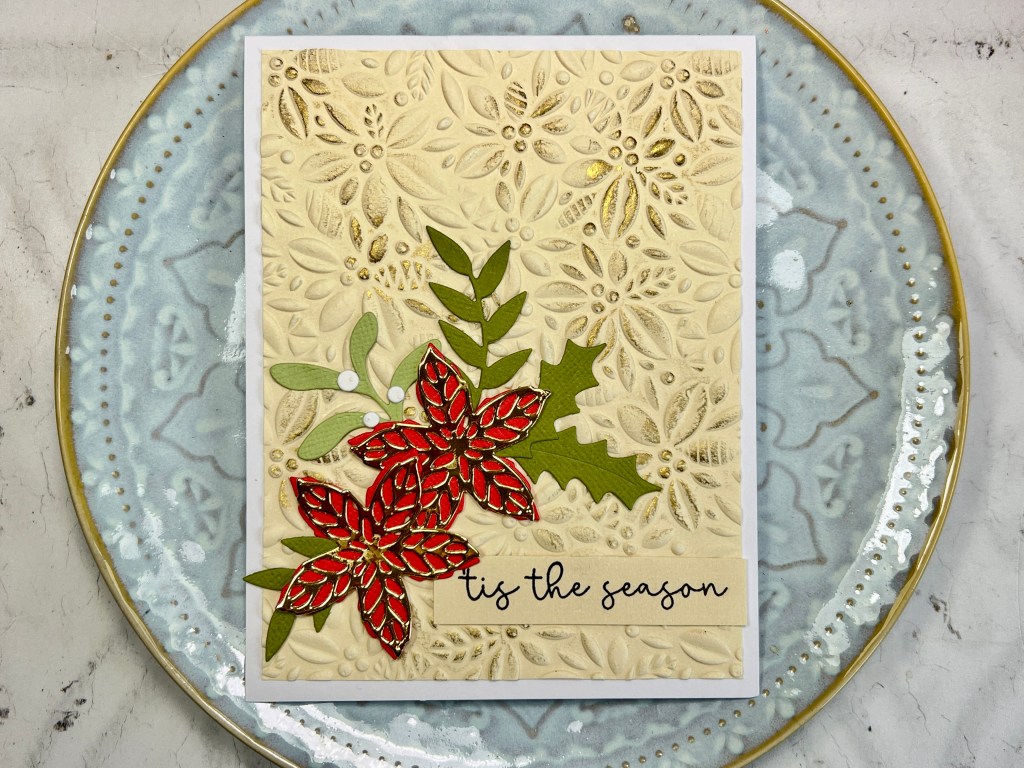
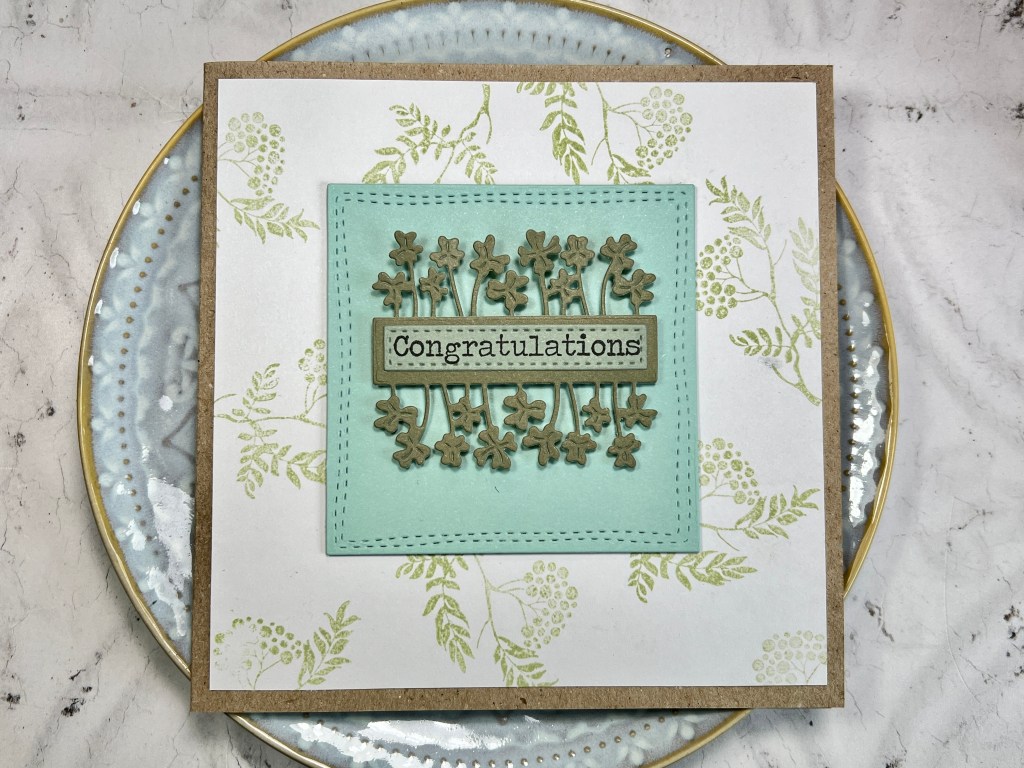
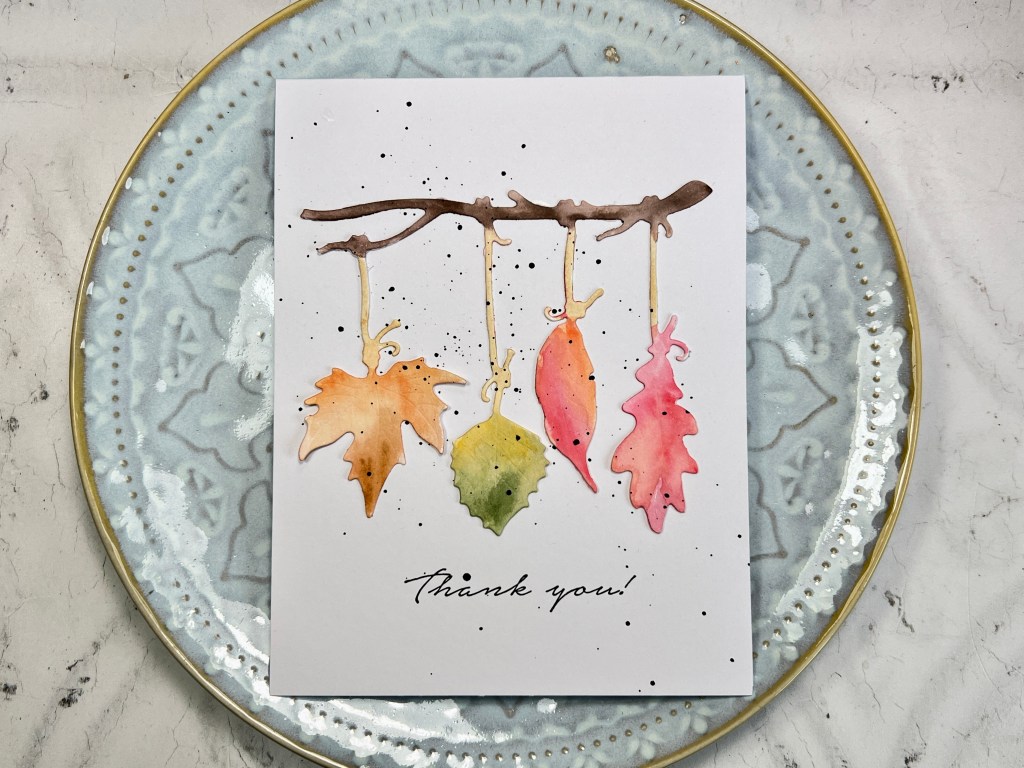
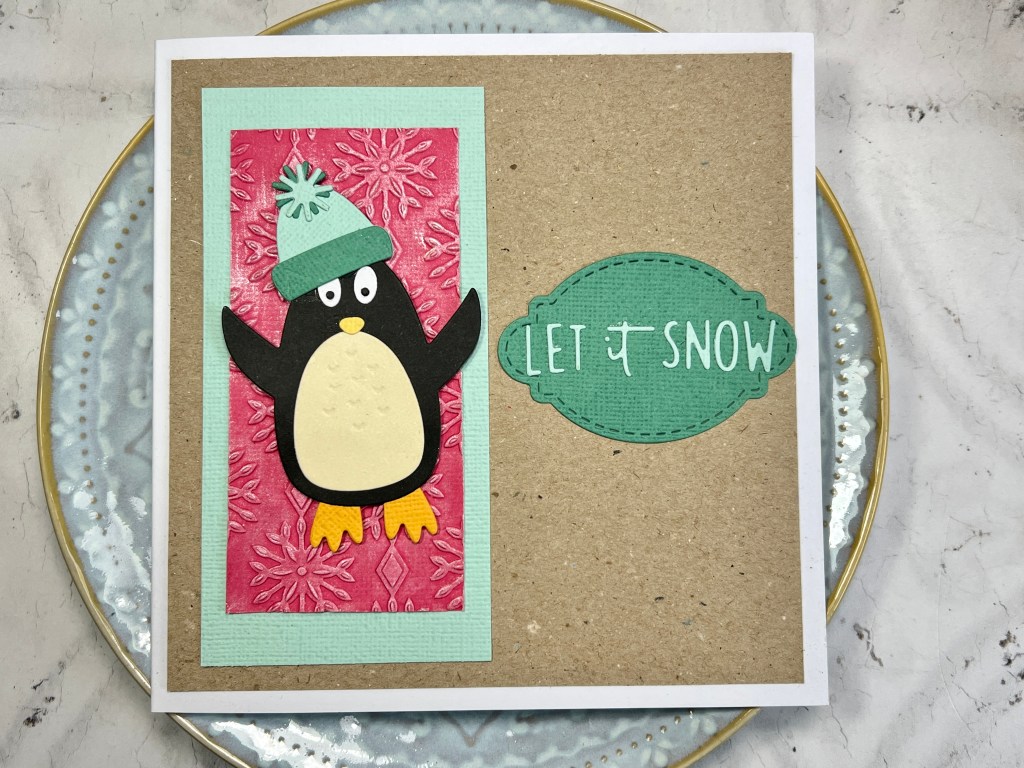
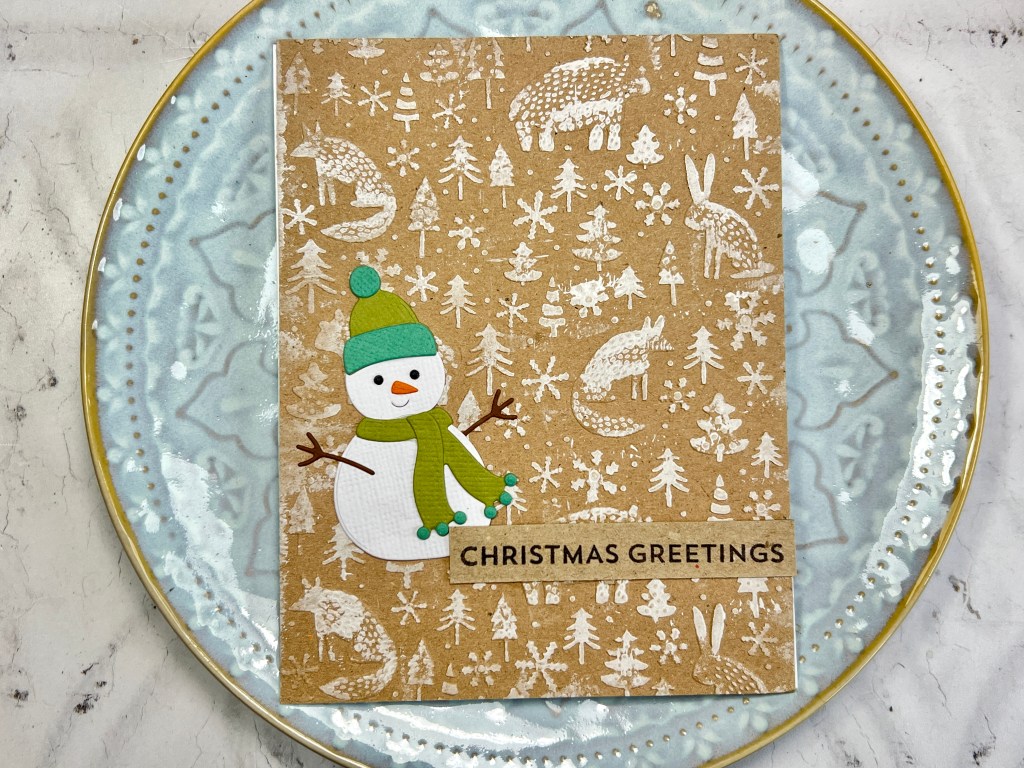
Here’s a little sneak peek of the cards we’ll be making at my next class – a bit of Christmas, as well as some general occasion cards. September will be full on Christmas!
There’s probably another couple to come, but I can’t share yet as they are with new die sets.
This class is fully booked, but if you’re interested in coming to a future class, drop me an email on backdated@hotmail.com
If you caught my Sizzix shows on Create and Craft TV last week, you might have heard me mention that I planned to do some crafting for myself at the weekend using the gorgeous Painted Birds die set.
I like to work a few months ahead with the birthday cards I send to friends, so my aim was to make enough cards to cover me until August!
This card with the little apertures was my favourite sample from the shows (but I couldn’t demo it there because the card shape die is from Studio Light, not Sizzix). Obviously, the way I craft for TV shows is a bit different than how I craft for myself because in real life we mix up the products don’t we?
I used a mixture of sentiments to go with the birds, (I’ll add links at the bottom of the post to all the products), but the sentiments are a Sizzix set called Variety Sentiments, and a Spellbinders set called Everyday Sentiments.
As well as birthday cards, I used the same design to make my dad’s Father’s Day card…
This was a good design for batch making, and also for using up card scraps, because you end up cutting from 5 different colours of card for the birds, that means you’ve basically got enough for 5 birds at a time which speeds it up considerably.
Affiliate links are used at no cost to you
Sizzix Big Shot Die Cutting machine Shop at: SSS | SZ | AZ | CS | SBC
I’m back at Create and Craft on Tuesday and Wednesday this week with some fabulous new floral dies by Sizzix designer Alexis Trimble. You know me and florals, so you can imagine how much I’m looking forward to the shows!
There’s a lovely mix of flowers in the collection, as well as a die set to give you all the pots and vases you need to create a lovely floral bouquet.
My shows on Tuesday are at 4pm and 8pm and Wednesday at 8am (and then a final show on Craft Extra at 10am). If you aren’t in the UK or are unable to catch the shows, I’ve added product links below for you to find the dies.
Affiliate links are used at no cost to you
Sizzix Big Shot Die Cutting machine Shop at: SSS | SZ | AZ | CS | SBC
Sizzix Hello Love die set by Lisa Jones Shop at: SSS | SZ | CS | SBC
Sizzix In the Meadow die set by Alexis Trimble Shop at: SZ | CS | SBC
Sizzix Floral Vessels die set by Alexis Trimble Shop at: SZ | CS | SBC
Sizzix Floral Alphabet die set by Alexis Trimble Shop at: SZ | CS | SBC
Hi everyone, hope you managed to catch the launch party on Eileen Hull’s facebook group yesterday – if not it’s worth checking out.
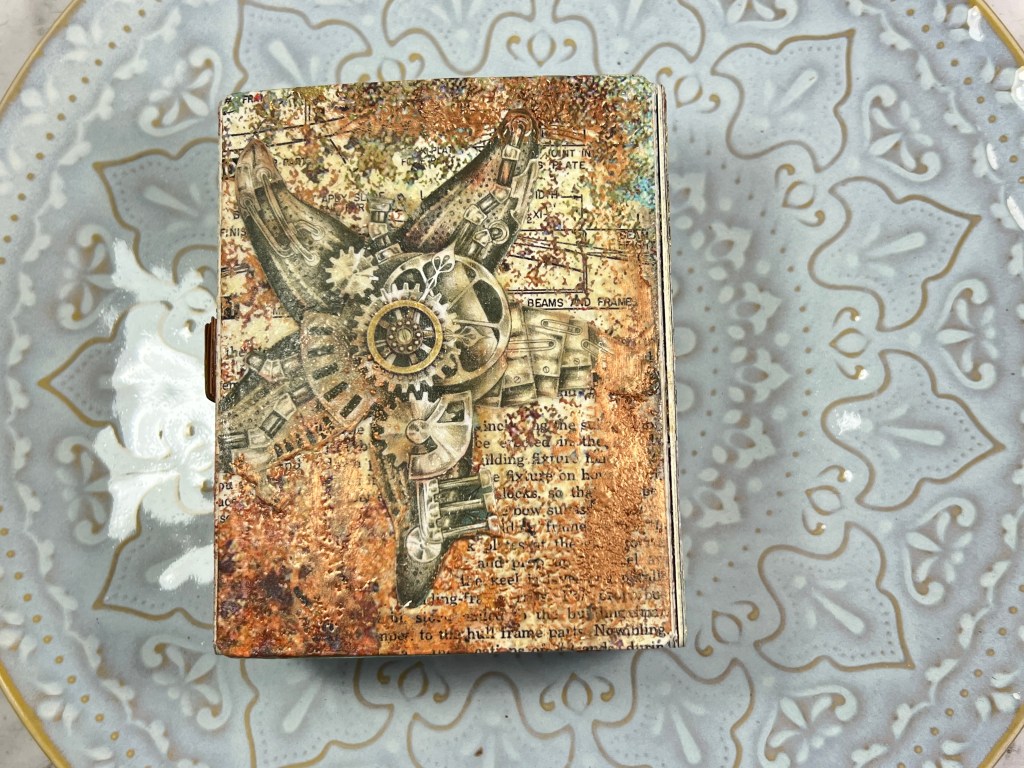
I’m back today with the rest of the projects I made with her new Chapter 2 release. First project is this sea themed Card Case. I used papers from Stamperia to create this kind of steam punk/ocean themed case with lots of texture.
I covered some Sizzix mat board with the papers, and covered with a clear varnish. I dry brushed some metallic paint over the cover in places, and added some textured embossing powder to give a rusty/patina look. I added the pocket on one side, and added some cards cut with the journaling die set as well as some tags.
On the other side, I added a little notebook – also covered with some of the papers.
I created a fastening with Sizzix Texture roll in the tan colour. I used some magnets from Carnation Crafts to hold the fastening in place.
For my next project I created another Card Case – this time a more simple design where I chopped off the folding part so it’s more of a little notebook/journal than a case.
I covered the mat board with Sizzix Texture roll in white, then took another piece of texture roll and embossed it with the Tim Holtz Mosaic embossing folder. I used Oxide sprays and Foundry wax and gold acrylic paint to give it some texture.
For the inside, I made some envelopes with the Journaling card, Envelope & Window die set, and attached them to the inside with the Bookbinding and Label die set that came out last year.
Finally for today, a couple of cards showing the fabulous Mini Slimline & Tickets die set. So many different ways to use these, so I’m looking forward to making more cards with them.
That’s it for today. Make sure you check out Eileen Hull’s blog and Facebook group to see all the inspiration there – her DT really have come up with some amazing projects.
Affiliate links are used at no cost to you
Sizzix Big Shot Die Cutting machine Shop at: SSS | SZ | AZ | CS | SBC
It’s another amazing release from Eileen Hull. I just love how versatile her designs are, and that they are basically blank canvases, for any style you choose. Make sure you pop by her FB page or YouTube channel today to catch the launch. All the participants for the blog hop can be found on her website http://www.eileenhull.com
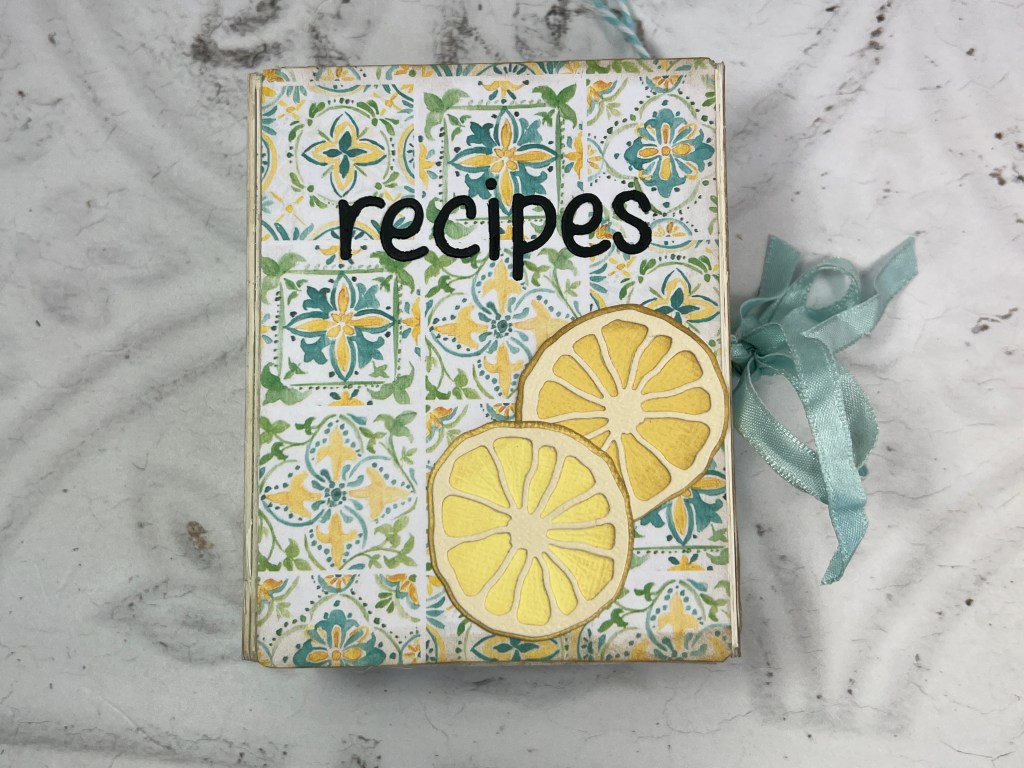
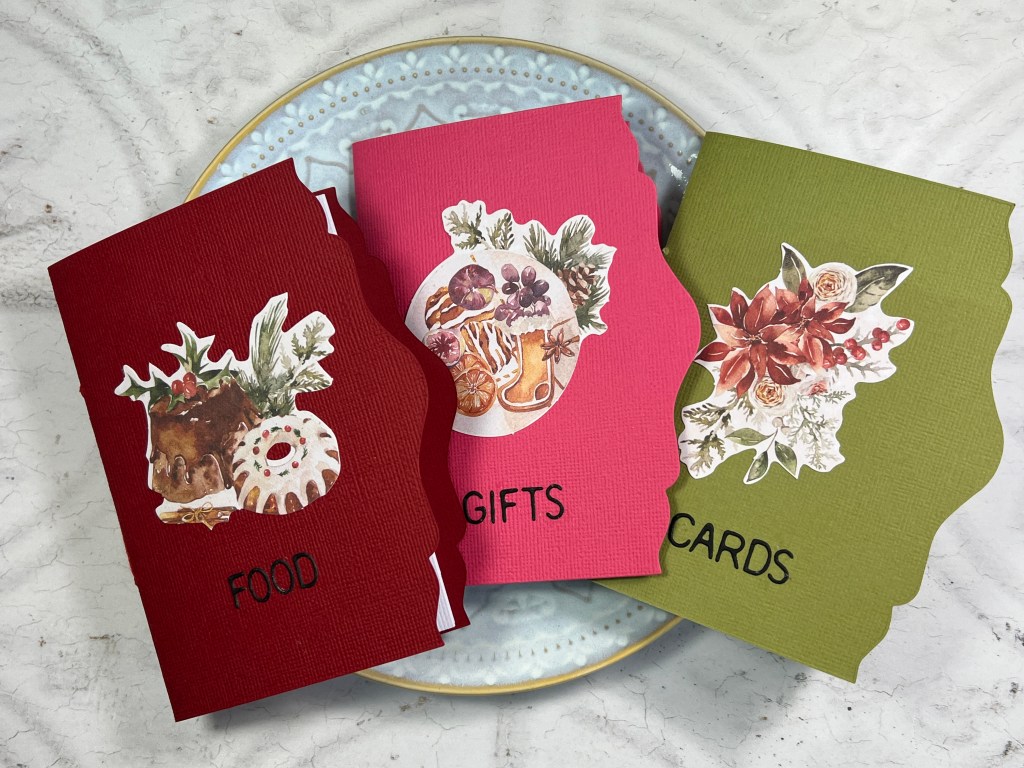
I’ve got some more projects to share over the next couple of days but today I’m just going to share this one, it’s a little recipe book made using the new Card Case Bigz die.
So let’s start with what’s in this release. First is the Bigz die – the Card Case. It’s a Scoreboards XL die, so that means it can be used with either the standard Big Shot, or the Plus/Switch. You just need the extended cutting pads if you’re using it with the standard Big Shot, Foldaway or the Express. I’ll put links at the end of this post to everything you might need.
The next die in this release is the Journaling Card, Envelope and Window. This is really an add-on to any journalling dies you already have. It creates a really cool envelope and journalling card, with options to add a window and customise it. The card fits perfectly in the little pocket you create in the Card Case, so it’s great if you want to use it to create your own ephemera, or add photos or journaling. It’s a thinlits die set so will work with most die cutting machines.
Final die set in this release is the Mini Slimline and Tickets. This is similar to the Snail Mail version out last year. I can be used to create an interesting background or you can snip along the dots to create apertures, or individual tickets (great to use with ticket style stamps, or for sentiments). You get one larger panel and then a strip.
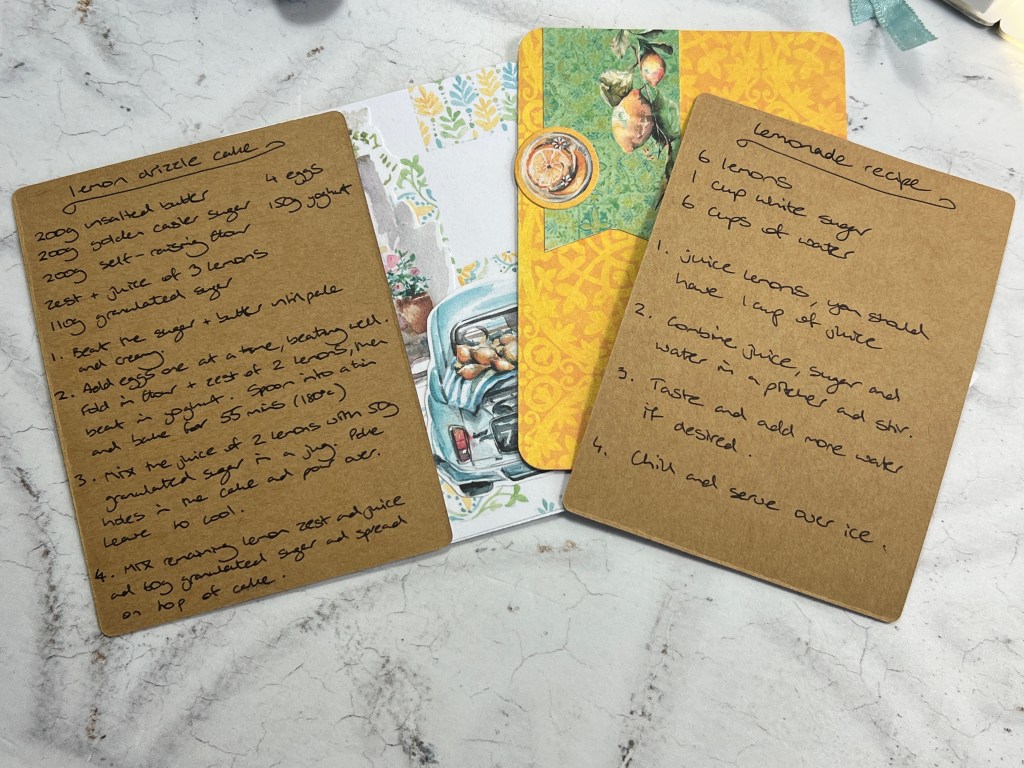
Back to today’s project. I had some really nice papers from Studio Light that had featured on a show I did on Create and Craft TV. I really loved the papers, and the kind of Tuscan feel they had, so I decided to theme my Card Case around those. Since they have a bit of a lemon theme, I thought a recipe book would be a great way to use them. I looked up some lemon recipes and used the cards from the Journaling Card die set to make little recipe cards, then decorated the whole thing with the papers.
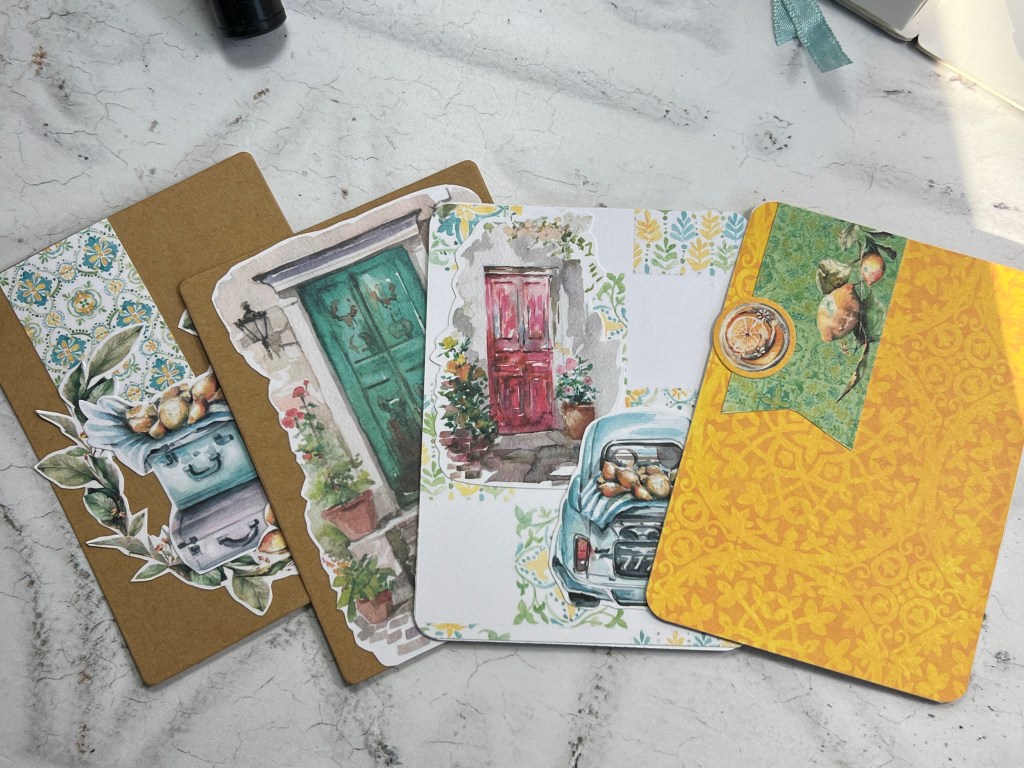
I picked out some of the die cut elements from the paper pad to decorate the reverse side of the recipes and to add more cards.
With the Card Case, it’s kind of double sided, and wraps around itself, so could be used in many ways, and you can choose whether to add the pocket, and whether you want it on both sides or just one.
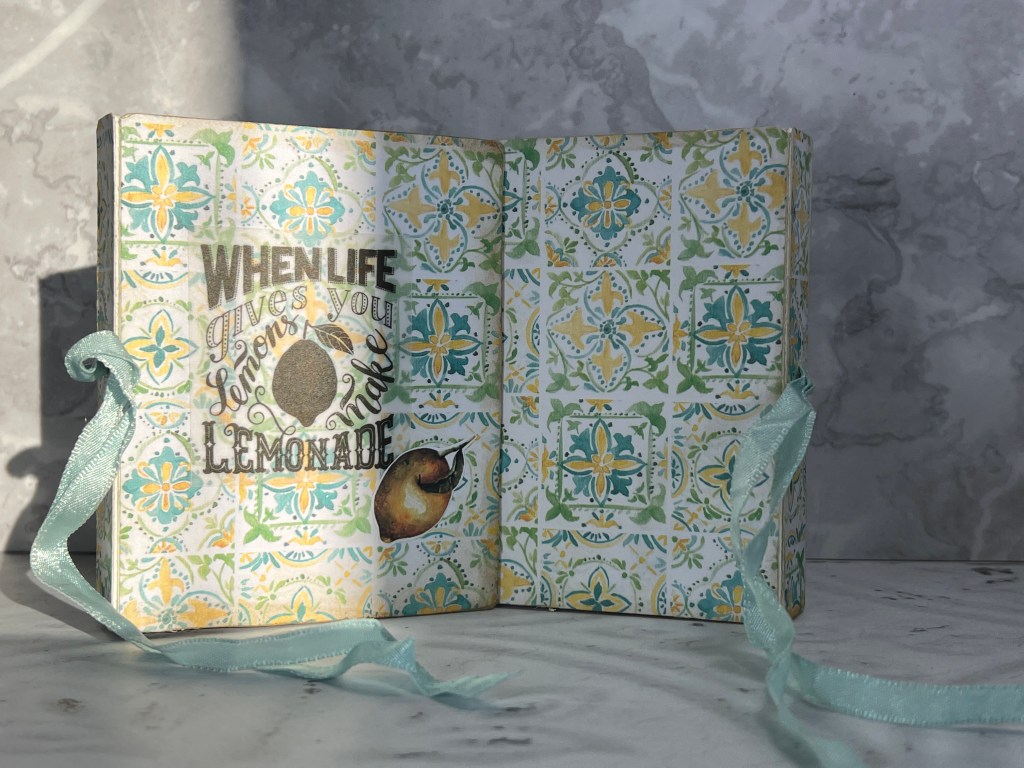
I decided to just add one pocket to put my recipe cards in, then to create a thin pocket on the other side to add tags. Then in the centre, I added a little note book, which is attached to the spine of the case with elastic cord.
Where the case wraps round, I added a little vellum sentiment along with a die cut.
I used the little button from the Bigz die on the inside of the spine to hold the ribbon in place to create a fastening.
I was so pleased with this. It’s a great way to use up some of those lovely scrapbook papers you’ve been hoarding!
I’ll be back tomorrow with some more projects from this release.
In the meantime, pop to Eileen Hull’s Facebook Group (Eileen Hull Fanclub) or her FB page (Eileen Hull Designs, or her YouTube channel to watch the launch, and leave a comment saying what other dies from her collection you think would work with this release for the chance to win a giveaway.
Please also visit http://www.eileenhull.com to catch all the other amazing inspiration on this blog hop!
Thanks for popping by!
Affiliate links are used at no cost to you
Sizzix Big Shot Die Cutting machine Shop at: SSS | SZ | AZ | CS | SBC
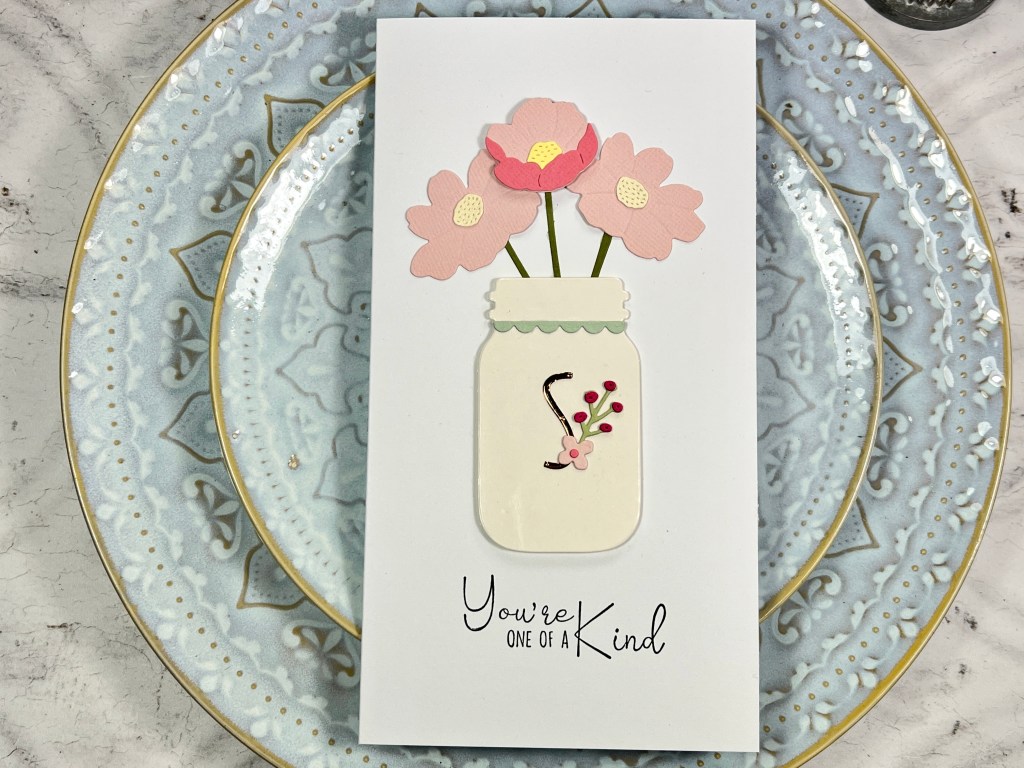
Aren’t these big, bold blooms beautiful? I’m really in love with this collection by Simon Hurley, you know me and floral dies, so these are just my thing.
I wanted a bit of variation to the petals so chose to watercolour them instead of using coloured cardstock and I’m really pleased with how they turned out. I thought the sentiments would look lovely with a touch of glitter so I used gold and silver glitter card, but used the same white card for the shadow/mat layer to keep it clean and simple.
Here’s a video on how I put these together….
Affiliate links are used at no cost to you
Sizzix Big Shot Die Cutting machine Shop at: SSS | SZ | AZ | CS | SBC
Spellbinders In Bloom by Simon Hurley Shop at: SSS | SBC | SP
Spellbinders Everyday sentiments by Simon Hurley Shop at: SSS | SBC | SP
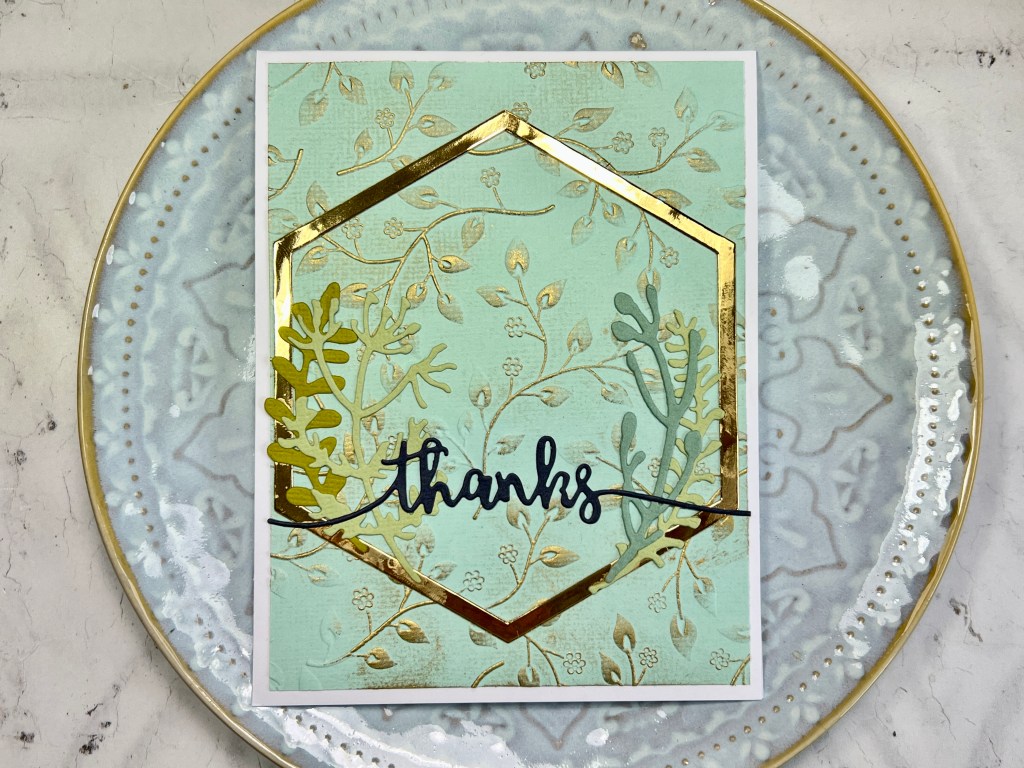
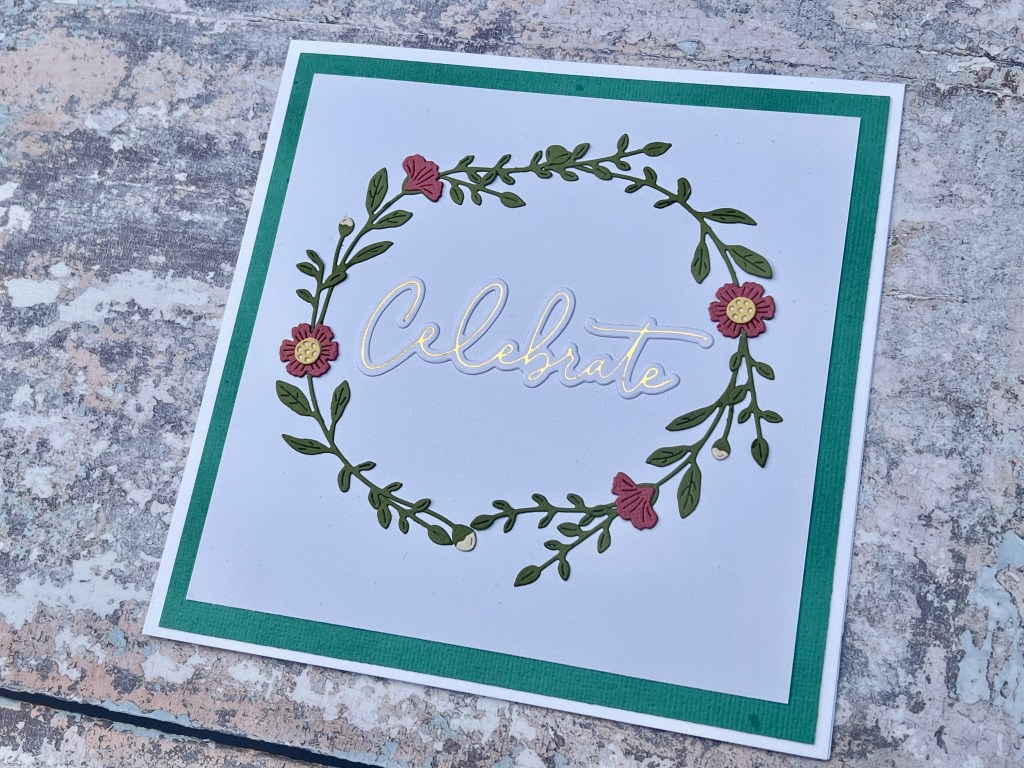
I’ve got a new video up on my YouTube channel today showing how I made this cute wreath card, along with the foiled sentiment.
Here’s the video – it gives a good look at the Spellbinders Glimmer Foil system too, which I know lots of you are curious about (and in my opinion it’s a fabulous foiling system)
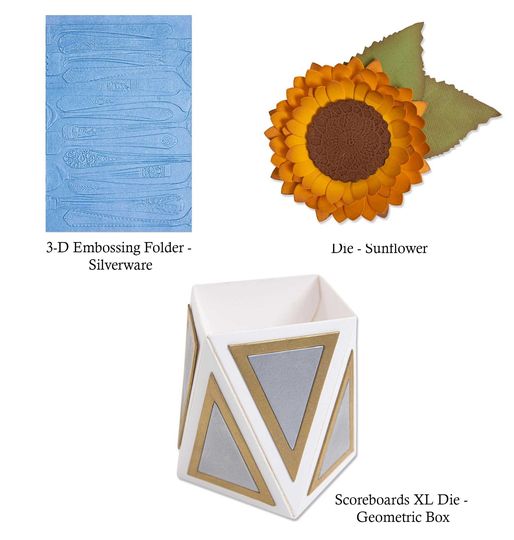
I’m back at Create and Craft TV on the 17/18 October with the new release from Eileen. This release consists of 2 Bigz dies – Geometric Box and Sunflower, and beautiful 3D embossing folder called Silverware.
Affiliate links are used at no cost to you
Sizzix EH Geometric Box Bigz die Shop at: SZ | AZ | CS | SBC
Chapter 4 is finally here! Each release is so exciting and it never gets old…
Eileen has 3 products in this release, all a little bit different.
First up is the Geometric box, here’s what Eileen had to say about it…
The Geometric Box is a different kind of design for me. I love the ease of assembly, the unique shape and and the possibility of expanding the box into larger containers! This is a ScoreBoards die so it may be cut from sturdy materials like matboard, chipboard, metal, leather and fabric. The finished box measures 4” h x 3” w x 4” d… or so… a fun feature of this die is that it adapts to how you shape it. You’ll see Watch my livestream videos to show how to expand the possibilities of this die.
Use the Geometric Box for storage- for pencils, silverware, flowers, or tools. The box may also be used as a gift container- imagine adding teabags, a pretty silver spoon and a bow as a get well gift!
And here’s my project using the Geometric box, I decided to make a little gift box, using Rose Gold Texture roll to cover my box, and then I cut some extra panels and embossed them with the Acorns embossing folder by Tim Holtz. I had some ceramic knobs lying around and I thought the bright blue would look lovely against the rose gold. I created a little hinge for the lid, just with a couple of strips of texture roll.
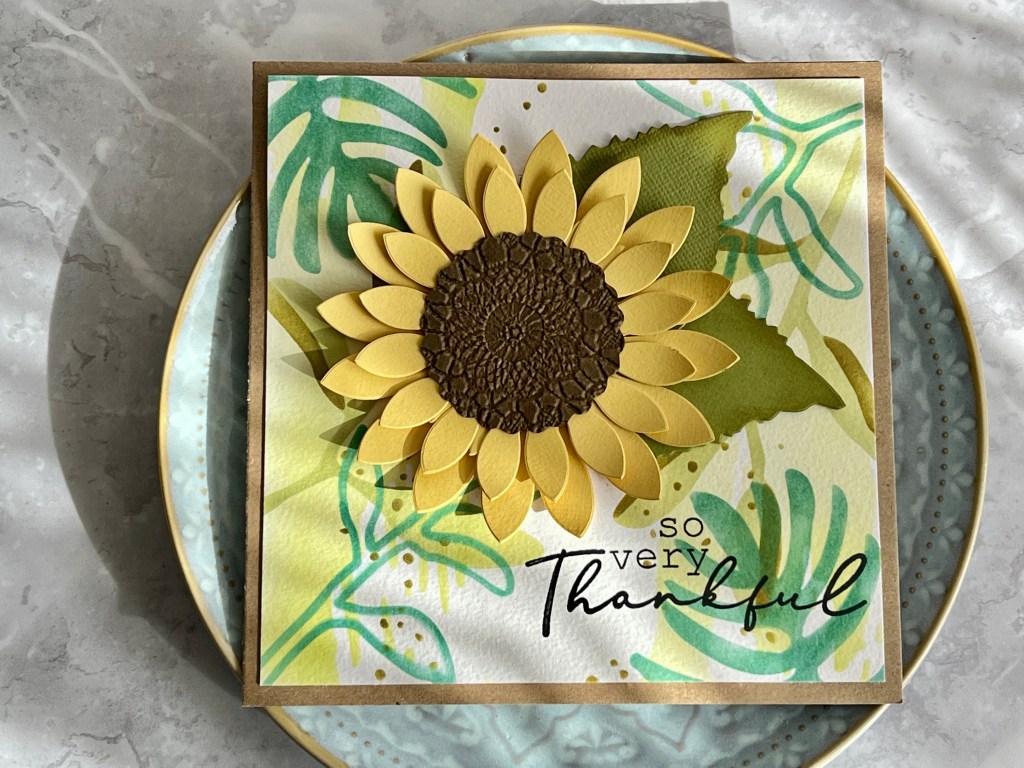
Next is the beautiful sunflower…..
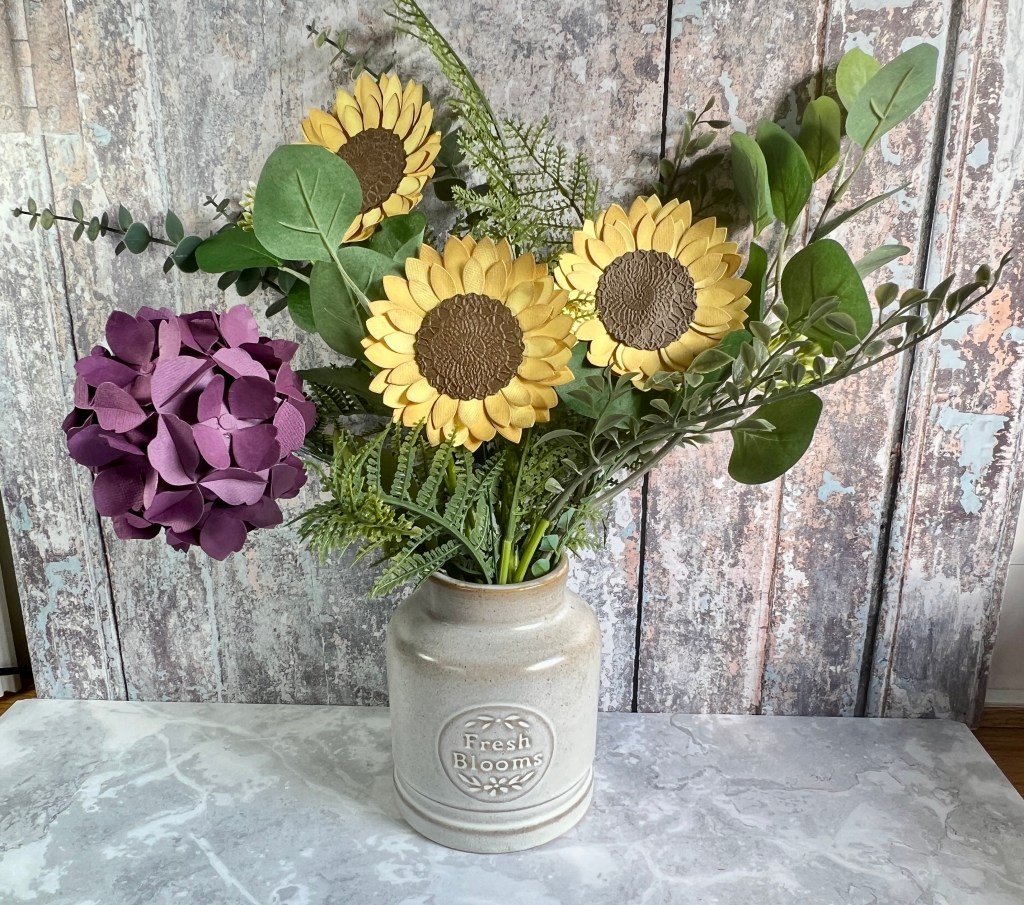
The Sunflower is a Bigz L steel rule die- designed to cut and score a myriad of materials. The Sunflower is BIG- it measures about 4″ across and comes with a leaf, three sizes of petals and a flower center! Stack layers of petals to make a traditional sunflower, or change colors and create a pink coneflower. The basic shape is there for you to create your own flowers! Make a stem for the flower using wire and your Twist and Style Tool. The coordinating Geometric Box die works perfectly as a vase.
I love the big bold size of the sunflower, it would be great cut from felt for home decor projects. I have other things in mind for this, as I like Autumn projects and feel that the sunflower works so well with Autumn schemes. I decided to make a card and combine the sunflower with one of the new Sizzix Stencil sets.
Last up for this release is a fabulous 3D embossing folder. I love the vintage style to this. Here’s what Eileen had to say about it…..
I love the whimsical patterns of vintage cutlery and that’s why I created this Silverware 3D embossing folder! The design is so detailed you can actually see a tiny bride and groom on the handle of a cake server.
This folder is perfect for creating seating charts, menus, invitations, cards and recipe books. You would be surprised at the many materials you can emboss- metal, paper, cardboard, Sizzix texture roll and more. Once you have embossed the image, rub a light coat of a metallic Luster Wax over the top of the design and you have an amazing result!
I haven’t had a chance to make anything with the embossing folder yet, but I have lots of ideas! I’m on Create and Craft TV with this new release on 17/18th October so by then I should have lots of fabulous projects to share with you!
GIVEWAY – Enter the giveaway! Join us at 5pm UK time/12.00 Eastern on Tuesday 4 October in the Eileen Hull FB group or YouTube. Comment below the Release Party video and answer this question, “What would you create with these dies?” We loved hearing all your amazing ideas last time and want to hear more! Extra points for creativity There will be two winners- one on Facebook and one on YouTube. Entries closed at 5:00 pm on Oct. 10. Winners will be announced on Eileen’s Tuesday 10/11 livestream.”