I’m starting my regular card making classes in Bromsgrove again, and I can’t wait!
The first class will be Saturday 16 July, 10am to 4pm. I do currently have a couple of places left so if you’re interested please email me – backdated@hotmail.com.
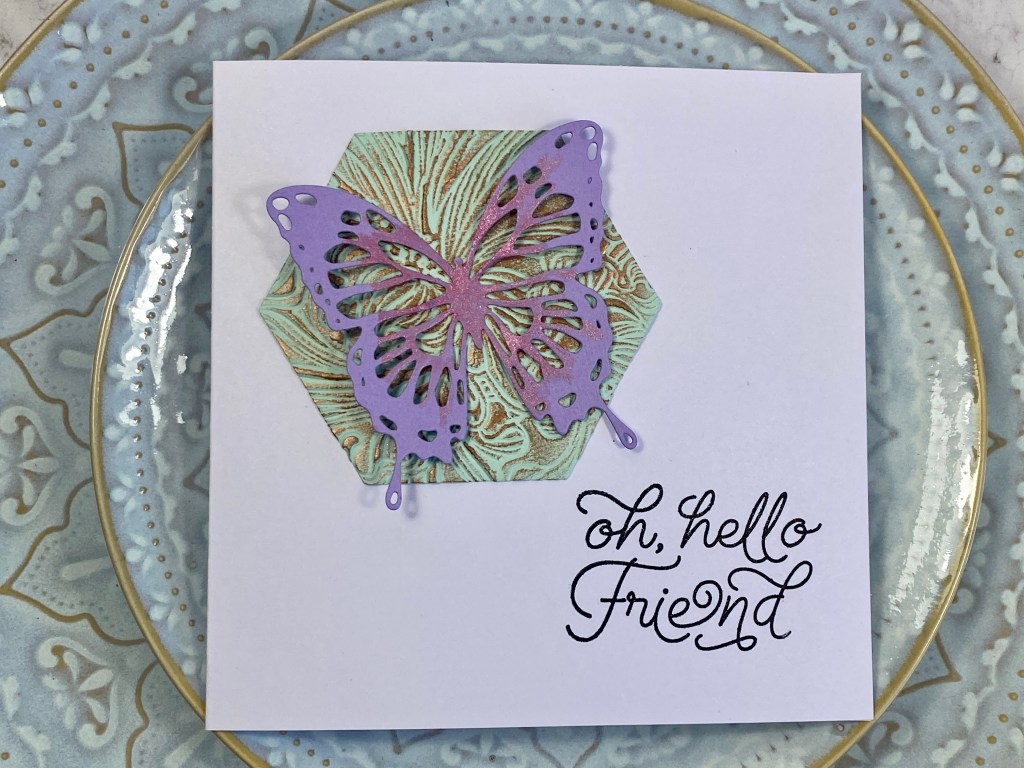
This class is all about general everyday cards – and you’ll notice a few of these will work for men as one of my ladies requested some ideas for men (always the most difficult to make I think).
Gosh I’m so excited for these shows. I have been so happy making all these projects. I have literally not left my craft studio the whole week I was making them except to eat and sleep!
So this is the Chapter 2 release from Eileen Hull, and unusually for her, this release doesn’t have any Bigz dies, there are 3 thinlit die sets, along with a stunning 3-D embossing folder called Crochet.
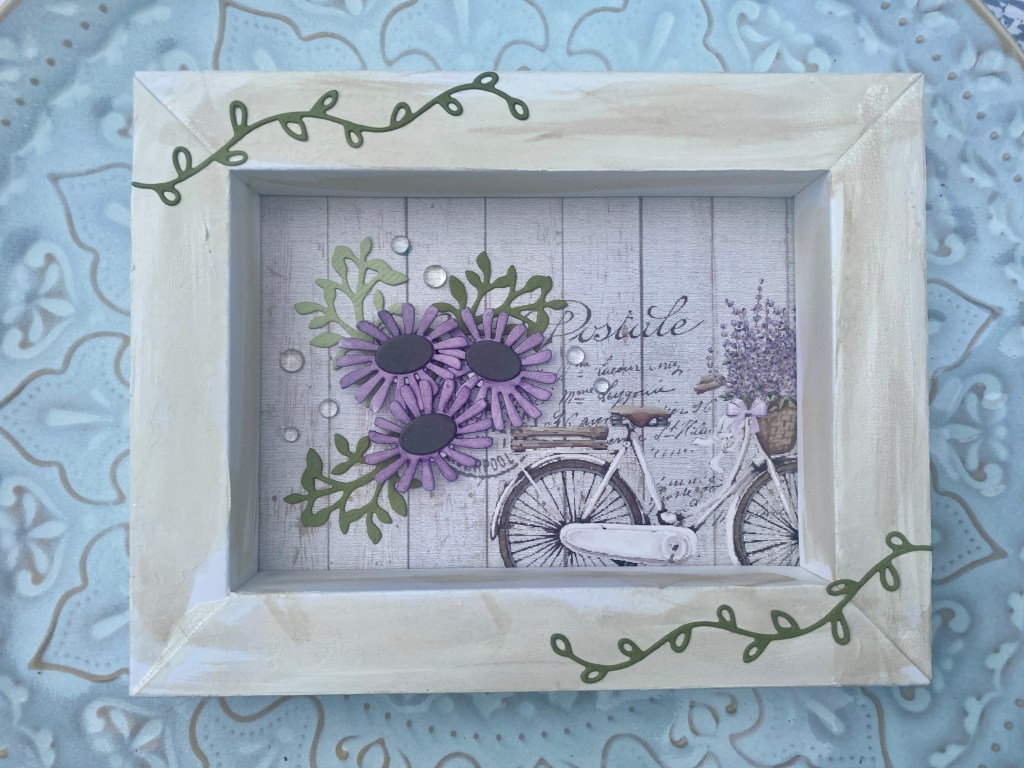
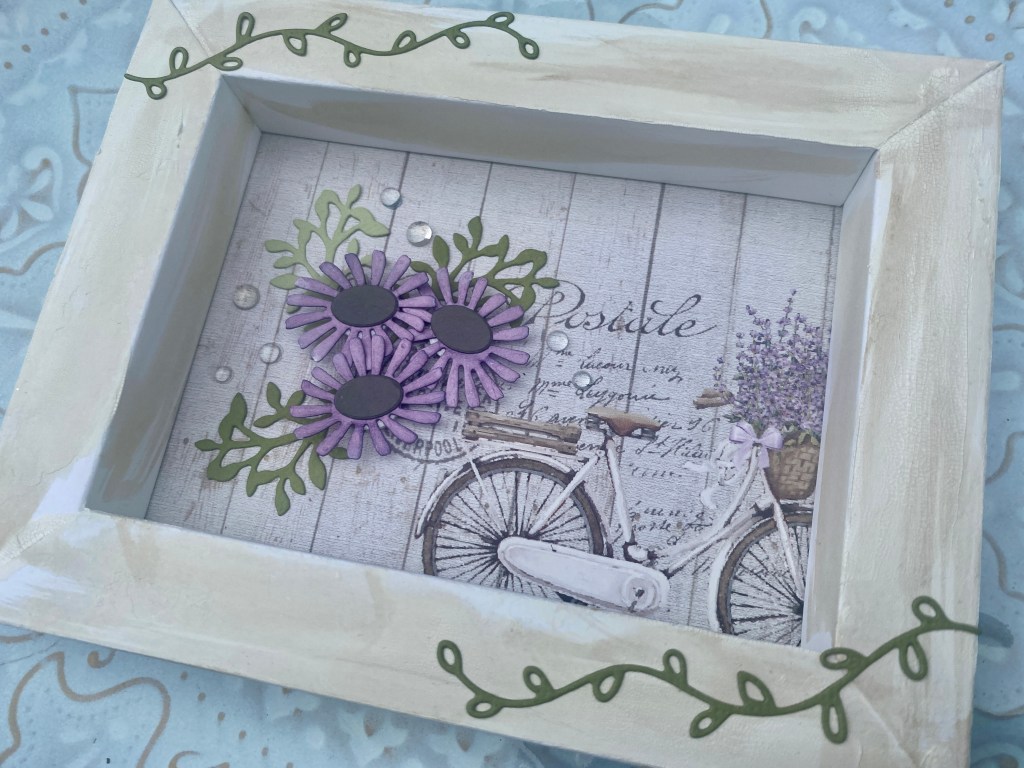
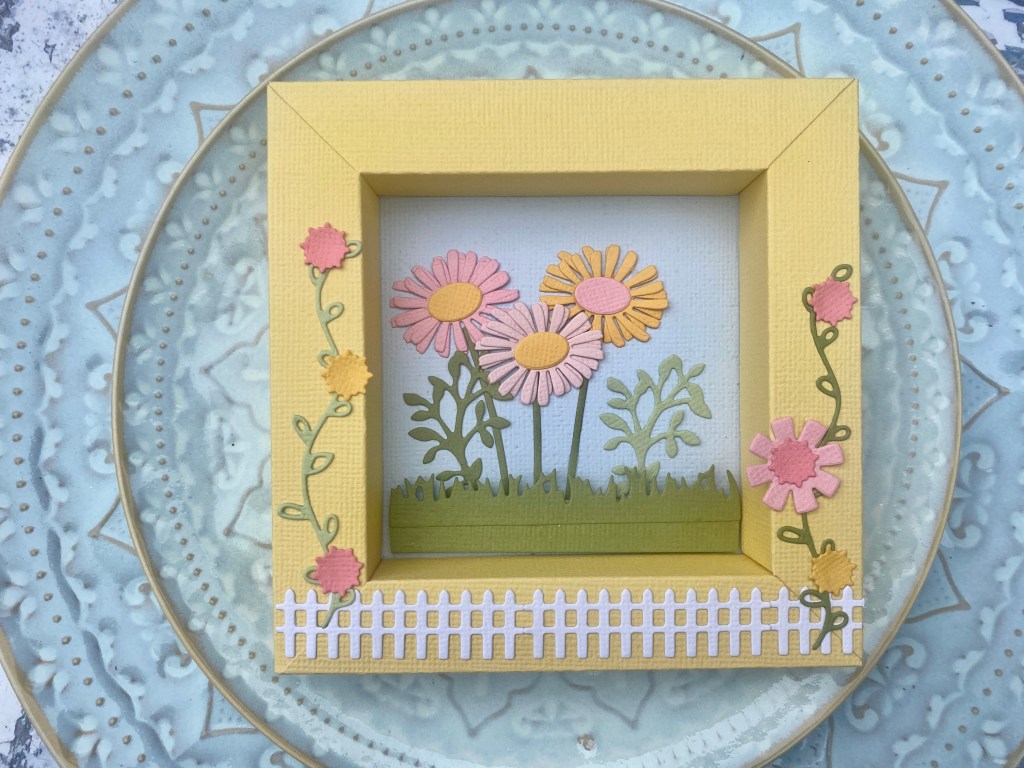
There are two sets that include the different size ‘sides’ to the shadow box. Shadow Box 1 allows you to create a small square frame, then Shadow Box 2 has a medium and large die, so you can create a landscape frame (as above). But of course, you can interchange the sizes, and say, just use the two longer sides of this one to create a larger square frame.
Then there’s a set called Shadow Box Elements that has some gorgeous little houses along with lots of other dies to decorate your frames. There are also extra elements in the frame sets.
I love the variety of elements in these sets, and the houses are just adorable. They are just as fabulous on cards as they are to create shadow boxes.
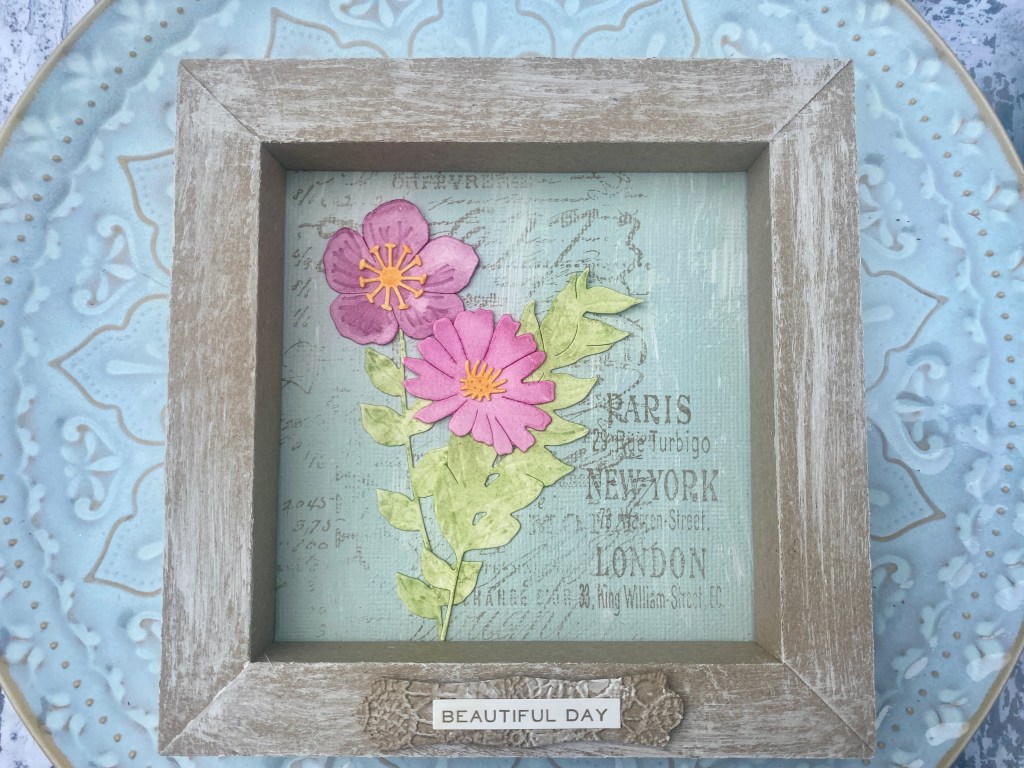
They also work so well with other die sets – for this square frame I used the largest shadowbox die and the Wild Blooms 1 die set.
I kind of replicated the project from the packaging photo for this one – it shows off all the little elements really nicely.
I’ve got lots more projects to share, so will pop back soon with more!
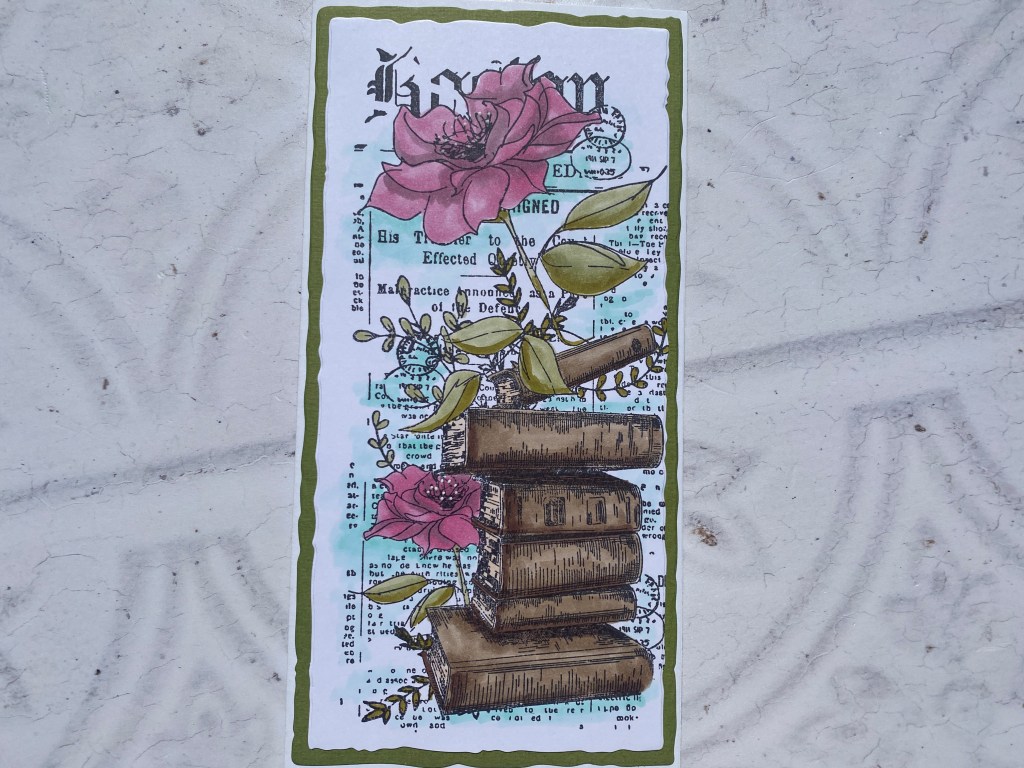
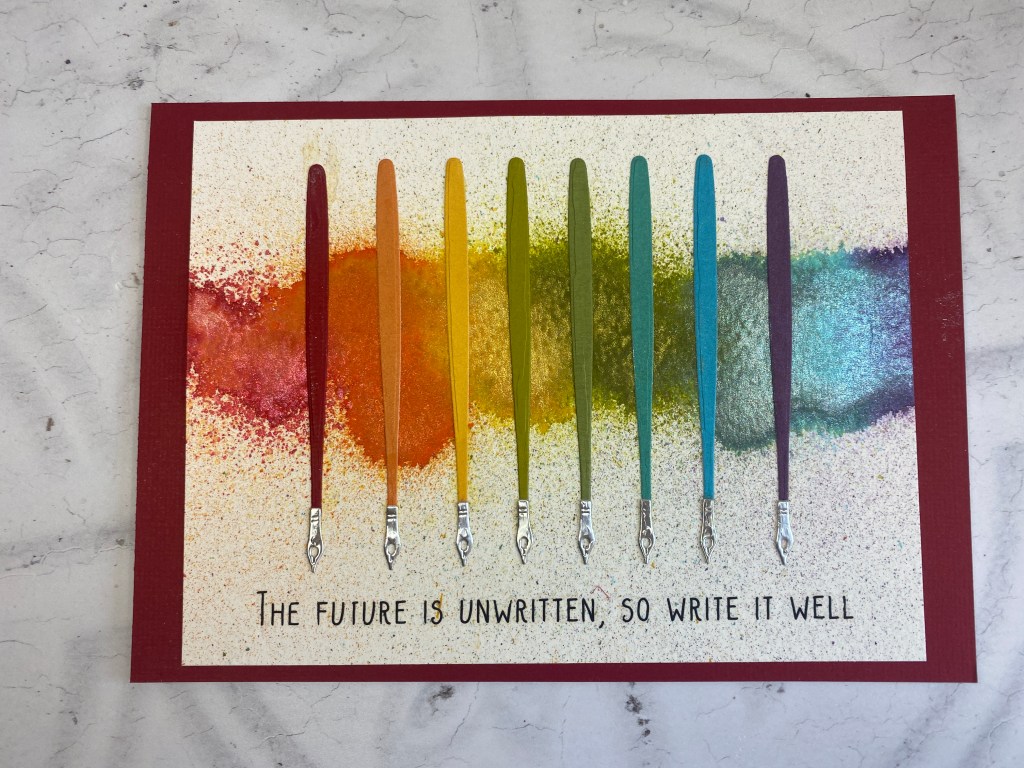
I’m back at Create and Craft TV tomorrow with a beautiful collection from Jenine at Studio Light. There’s a lot in this collection – papers, die cut elements, stencils, vellum, acetate, rub-ons, dies and stamps, all around the same vintage writing theme.
There’s so much in this collection, that if you go for the whole bundle, you will be making for months to come!
I think the style of these images lends itself to quite a romantic/shabby chic style, but really, it can work in many ways. If you like to add layers and mixed media you can, you can keep it simple with the dies and stamps if you like a more clean and simple look, and if you really want to make quick and easy cards you can use the paper pads and die cuts to create beautiful cards.
These are just some of the cards I’ve made, but please tune in for the shows for a better look because there is so much in this collection.
I’m on Create and Craft on Monday 25th and Tuesday 26th April, it’s a One Day Special so times are 6pm and 9pm on Monday, then 10am and 2pm on Tuesday.
I’ve also added some links below for CraftStash in the UK and Simon Says Stamp in the US who are also stocking this collection. If you’re in the UK, Craftstash do have some bundle deals here
Affiliate links are used at no cost to you
Sizzix Big Shot Switch Plus Electric die cutting machine white Shop at: SSS | SZ | AZ | CS | SBC
Sizzix Big Shot Die Cutting machine Shop at: SSS | SZ | AZ | CS | SBC
Sizzix Big Shot Switch Plus Electric die cutting machine Tim Holtz Black Shop at: SSS | SZ | AZ | CS | SBC
Sizzix Big Shot Switch Plus Electric die cutting machine cherry blossom Shop at: SBC
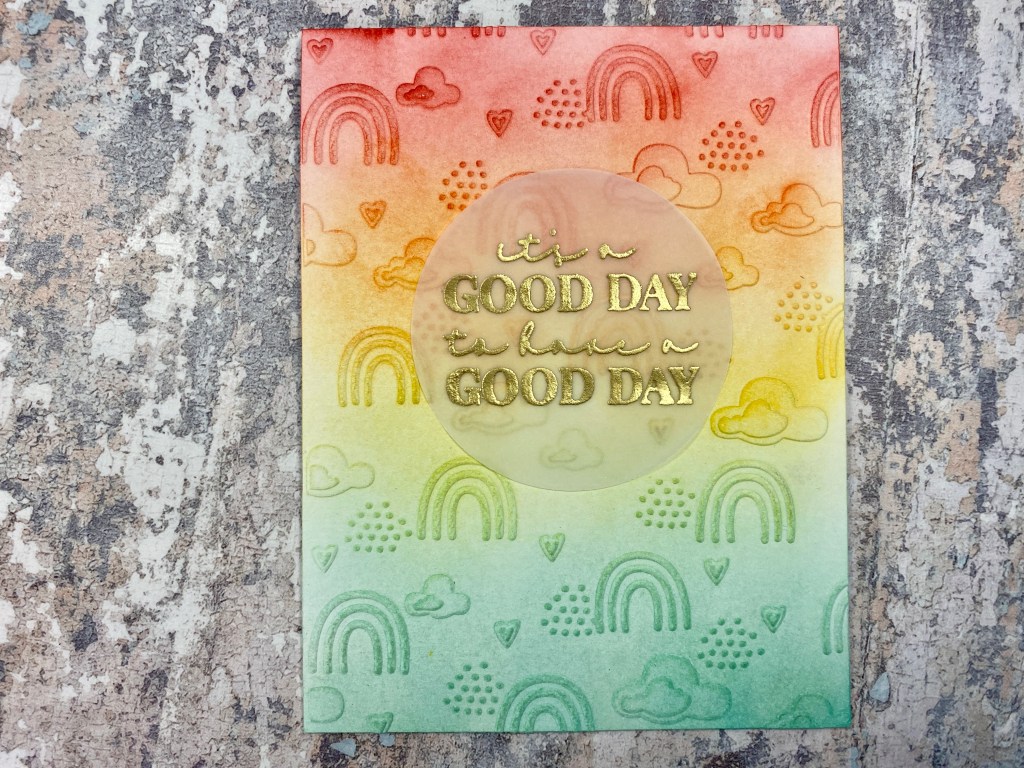
I’m back with more sneak peeks ahead of my shows on Monday – I’m on Create and Craft at 9am and 1pm. This set is called Rainbow Magic, and I really like the style of this rainbow. So many ways to use it. Each piece cuts separately so you can use different colours or just cut from watercolour card and colour yourself.
Next up, this set is called Bottles and Glasses, it’s got a fun champagne bottle, along with different glasses, and accessories. I cut the glasses from vellum on these cards to create these fun cards.
This is the Big Hugs set, and Positive Signs stamp set.
Last for today, there are a couple of new embossing folders on the shows – both are 3D folders, Rainbow Sky and Celebrate.
Affiliate links are used at no cost to you
Sizzix Big Shot Switch Plus Electric die cutting machine white Shop at: SSS | SZ | AZ | CS | SBC
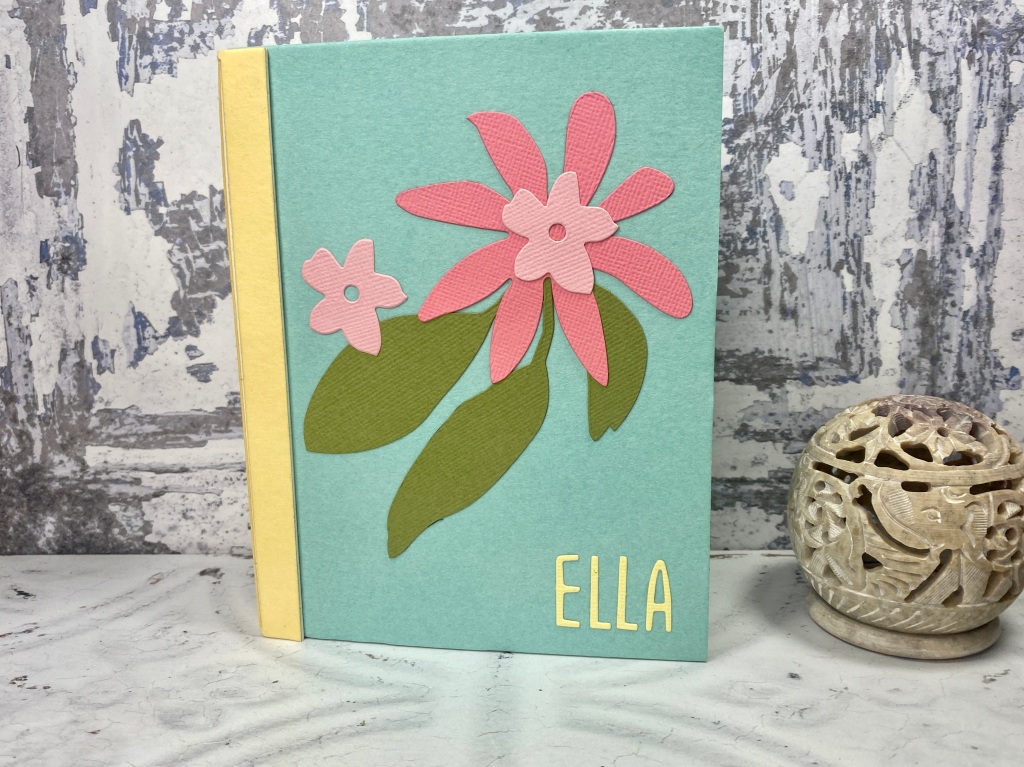
Today I’m sharing a little tutorial on this gift box/book, using the new Eileen Hull Book Box Bigz die.
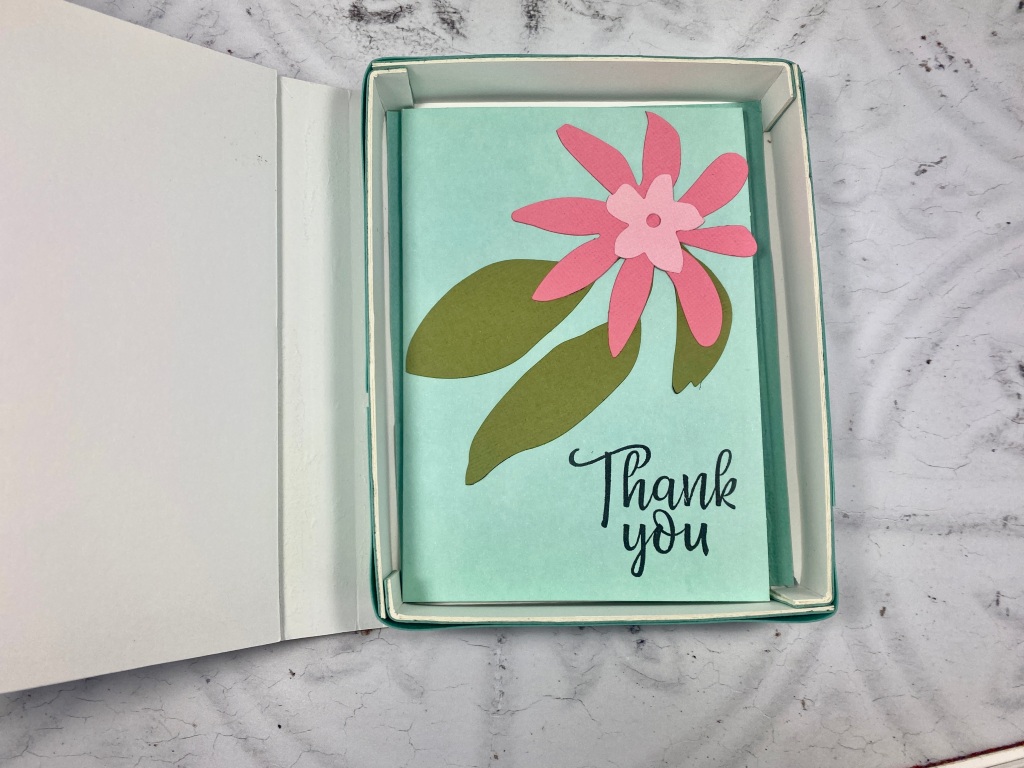
It can be used to create journals, or a lovely box in a book, which is ideal for adding a gift to, or as I did in this case, some handmade cards.
I’ve listed below all the products used (with links), but of course, you can use whatever papers and materials you have to cover your journal.
Take three pieces of Sizzix white Matboard and cover with double sided adhesive roll (I’m in the UK and buy my rolls from Crafty Devils, but you can find similar on Amazon).
I covered two pieces of matboard with Mint Julep, then the other with Limoncello.
Run the mint julep covered pieces through. This will give you two sets of each of the elements (because you will need two covers, and two sets to form the box. You can trim down the piece covered with Lemoncello so it just covers the spine section as that’s all you need from that (or you can cut it all and just save the extra pieces for other books).
I used red line tape to attach the spine to the front and back cover, and to assemble and attach the box section. The easiest way I found to tape the box part is to lay them out end to end and tape them together.
If you want to strengthen the box section, once you’ve assembled it and stuck it into the book, cut some strips of the mint julep texture roll, about 1 inch wide, then stick around the outside. It strengthens the box, but also makes it look neater.
I cut another piece of mint julep texture roll to fit inside the box area, and embossed this with the new Vintage Buttons embossing folder. It just makes the inside a little neater as it covers up where the box is taped to the back cover.
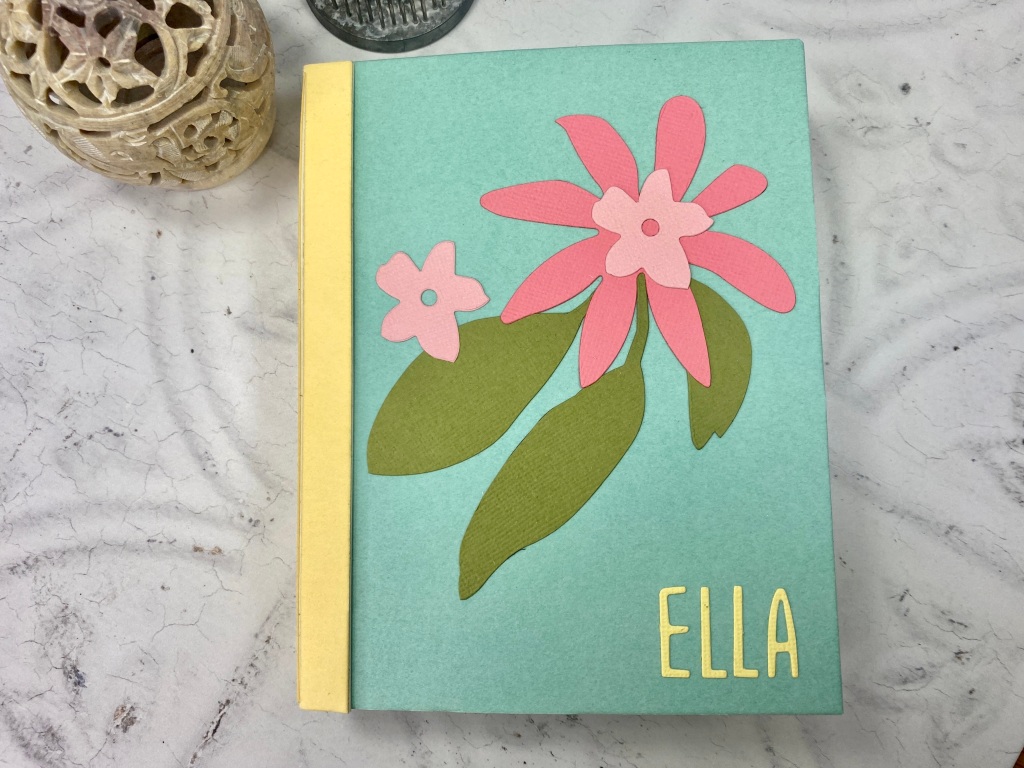
To decorate the cover, I kept it bright and simple with more texture roll. I used Primrose, Ballet Slipper and Limoncello, then some green cardstock for the leaves. I added my niece’s name using the Sizzix Handwritten Alphabet die. I find that using texture roll is a much better option when decorating journals, because it’s less likely to scuff or tear than cardstock, so if I have the right colour in texture roll, I’ll always use that in preference to card.
For the notecard, I carried on the same design, and used a Mint Julep notecard so that it matched.
Hope this tutorial gives you some fresh ideas for using these gorgeous new dies. Don’t forget to check out the Eileen Hull Fan Club group on Facebook because there’s always a ton of inspiration there.
Theres a really fun blog hop happening today to celebrate the launch of Eileen Hull’s new Chapter One release.
You can find all the info on Eileen’s blog – http://www.eileenhull.com/ as well as links to all the blogs taking part in the hop.
There’s a giveaway too! If you leave a comment for each of the designers in the Release Party Hop, or during the Facebook Live or YouTube video, you will be eligible to win one of the newly released products! Tell us what your favourite new product is and what you plan to do with it! Thanks for hopping with us
I’ve made three projects for this hop – you’ll be able to see these projects in more detail as I’ll have them on my shows on Create & Craft on 16/17 Feb. I’ll also be popping back here later in the month with a tutorial on the Book Box.
So the first project is using the the lovely Book Box. This die creates a journal with box element inside, so it’s perfect for popping a gift into, it’s also the perfect size to put cards in, so I think it would be lovely to make some matching cards to go with the cover then give that as a nice present.
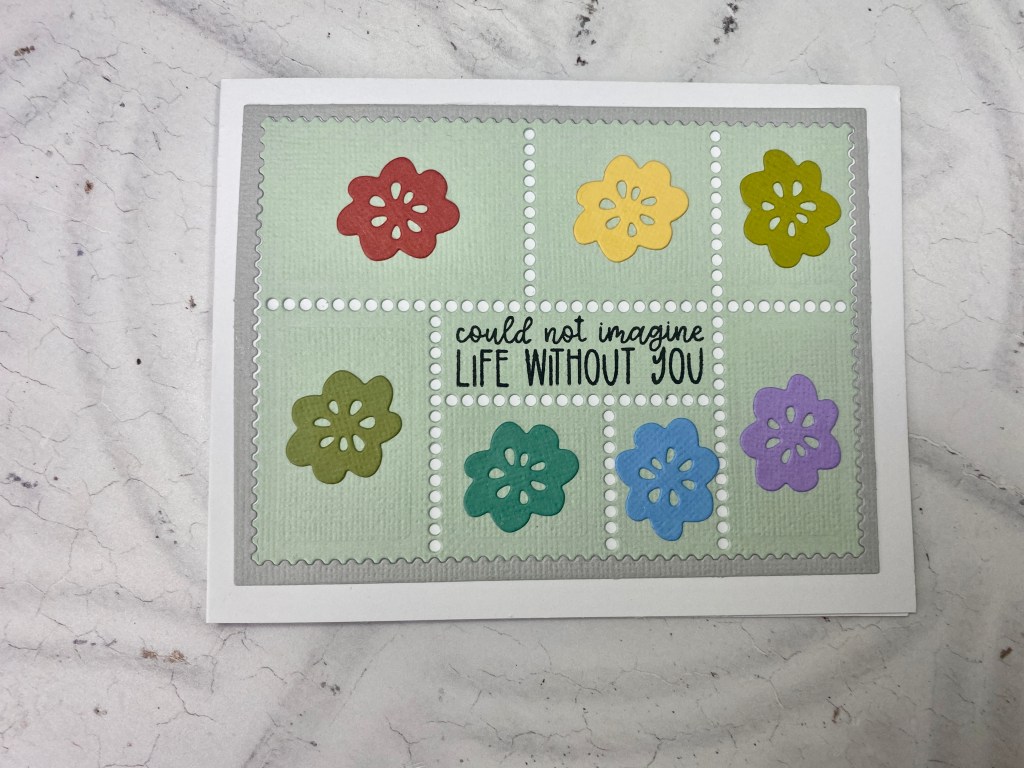
The next die I’m sharing today is called Snail Mail and it creates this really fun background for cards (or it fits nicely on the Book Box). You can also snip each element away (which you’ll see on my next project). This would work so well with different dies and stamps because it kind of creates little windows.
The last one I’m sharing today is an embossing folder called Vintage Buttons. It’s a 3D embossing folder so the detail is just amazing.
Don’t forget to pop to Eileen’s blog to see the rest of the release as well as all the amazing projects – http://www.eileenhull.com/
Well it’s been a long wait hasn’t it? I first saw the Switch in action at the trade show in Frankfurt in January 2020 and I was so excited about it coming out. Literally as soon as we all got home from Frankfurt, the UK went into the first lockdown, and the launch was postponed.
It’s been worth the wait. Mine arrived on Wednesday and I was so happy to finally get to use it. I’ve put together two quick videos for those of you that might want to get one. The first video is literally just an unboxing video so you can see what you get with the machine (it comes as a starter kit with some dies and an embossing folder). The second video is a more detailed run through how to use it – so you can refer to this once you get your machine and want to see a run through.
For those of you in the UK, the machine will be available first on Create and Craft next week. I’ll update the links below as it becomes available more widely.
Affiliate links are used at no cost to you
Sizzix Big Shot Switch Plus Electric die cutting machine white Shop at: SSS | SZ | AZ | SBC
Sizzix Big Shot Switch Plus Electric die cutting machine Tim Holtz Black Shop at: SSS | SZ | AZ | SBC
Sizzix Big Shot Switch Plus Electric die cutting machine cherry blossom Shop at: SBC
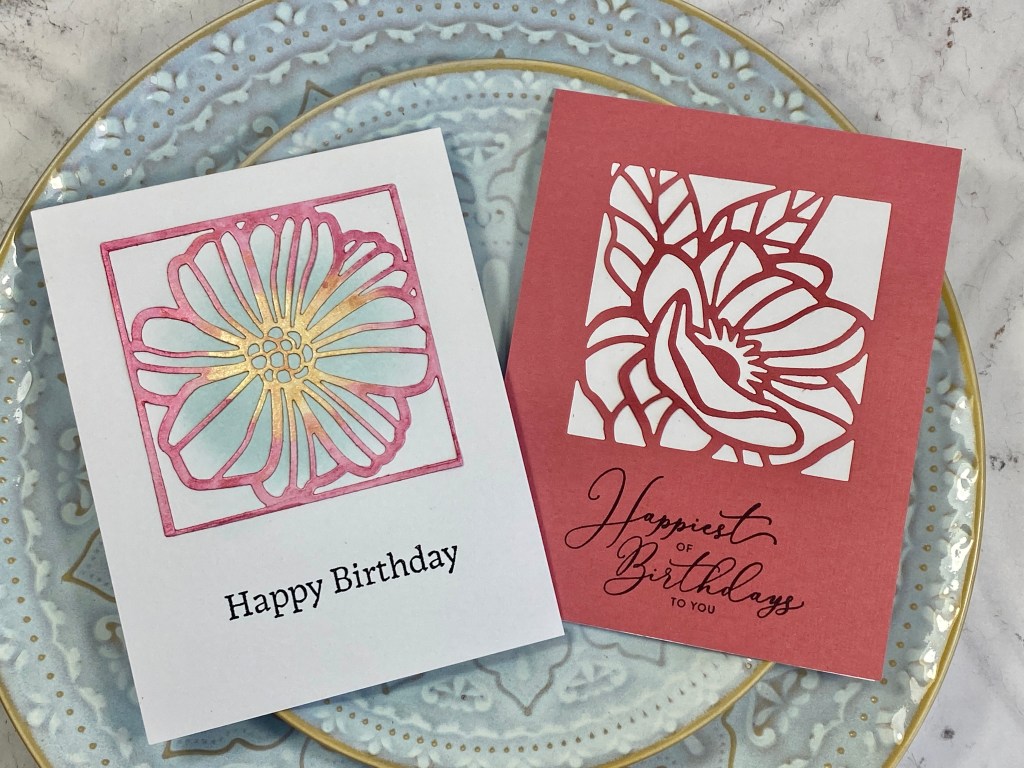
I’m back at Create and Craft this Wednesday with some shows on the Sizzix Color Story (or Colour Story for those of us in the UK – it feels odd typing the word color, but Sizzix is a US company so that’s the correct spelling)
The Sizzix Color Story is a whole range of products, following the same colour palette. The first product released in this range was the cardstock pack, and all those colours have since been used for acrylic paints, embossing powders, beads and sequins, felt, sculpting foam, glitter, cards and envelopes etc. This makes your crafting so easy, because it all co-ordinates so well.
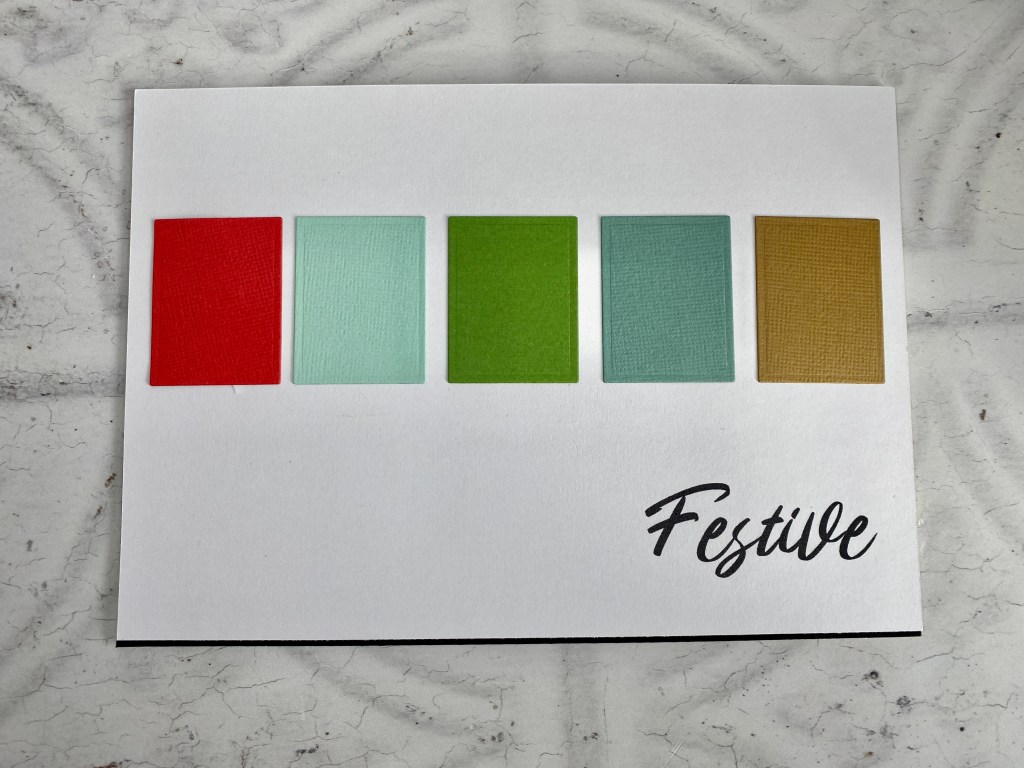
In my shows this week, we are going to take a close look at that colour palette, and I’ve put together some swatches so you can see how this one pack of cardstock, can take you through all the season’s and all occasions.
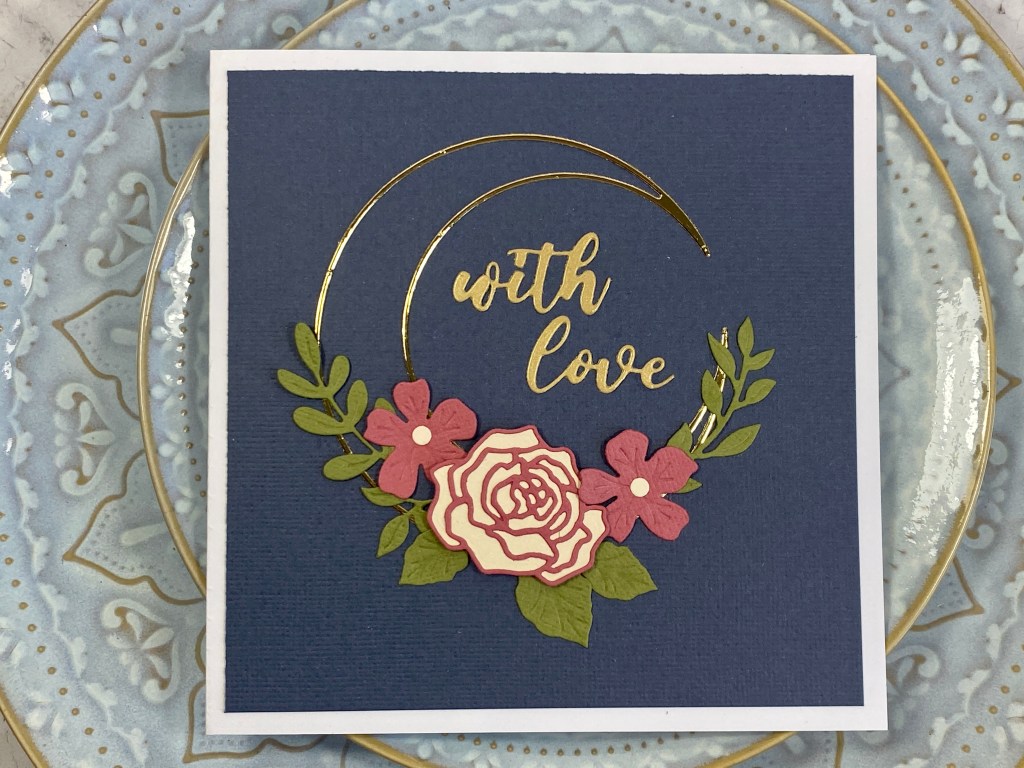
I’ve used just one die set – the Spring Foliage set by Pete Hughes, to create a wreath for each season:
Spring – Cherry Blossom, Limoncello, Ballet Slipper, Arctic Sky, Green TeaSummer – Primrose, Sorbet, Mint Julep, Mango Tango, Mermaid Kiss Autumn – Earl Grey, Hibiscus, Agave, Banana Blast, Caramel ToffeeWinter – Green Tea, Hibiscus, Earl Grey, Caramel Toffee, Lush Leaves
You can get such different looks from one die set just by switching up the colours. Pete Hughes put together some fabulous colour swatches – and you can find them on the Sizzix website, along with a video showing them.
So for different occasions, this card set covers those too:
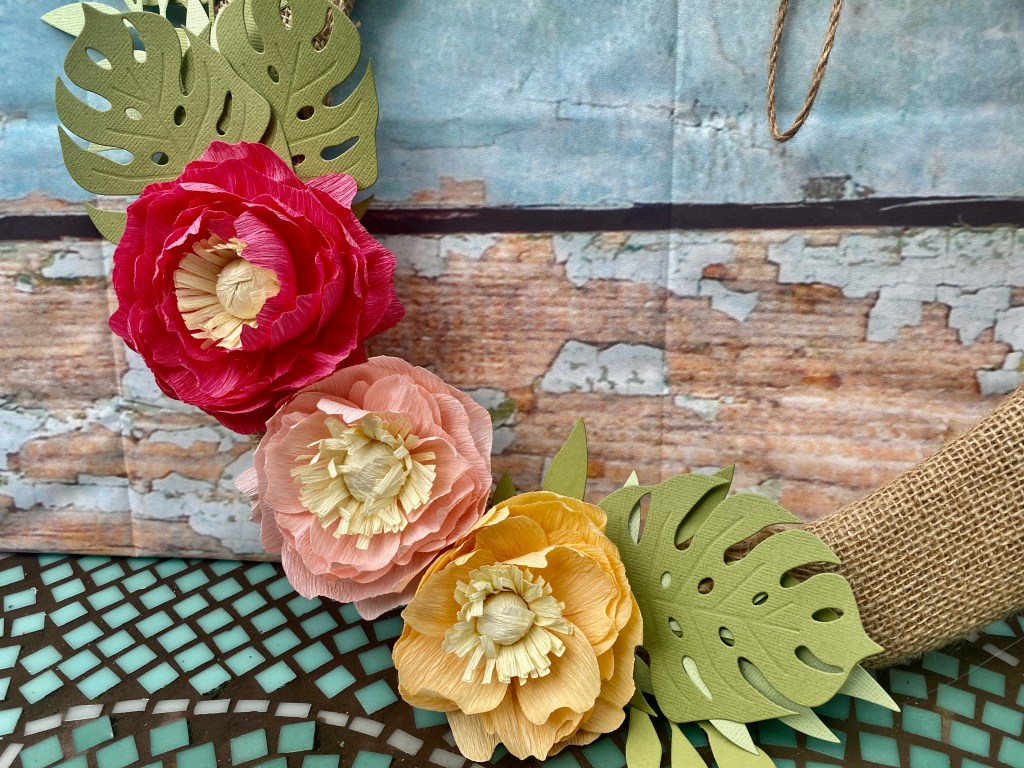
I can’t quite believe it, but my gorgeous niece Georgie is going to be 21 in July. Makes me feel very old. I decided to get my crepe paper flower dies out to make a bold statement flower to dress up a very plain kraft bag.
For the card, I used some dies from the recent Botanical collection by Lisa Jones at Sizzix, the Wild Wreath die is great for special cards.
I’ve put details below of all the other dies I used to create this gift bag and card.
Affiliate links are used at no cost to you
Sizzix Big Shot Die Cutting machine Shop at: SSS | SZ | AZ | CS | SBC | CC
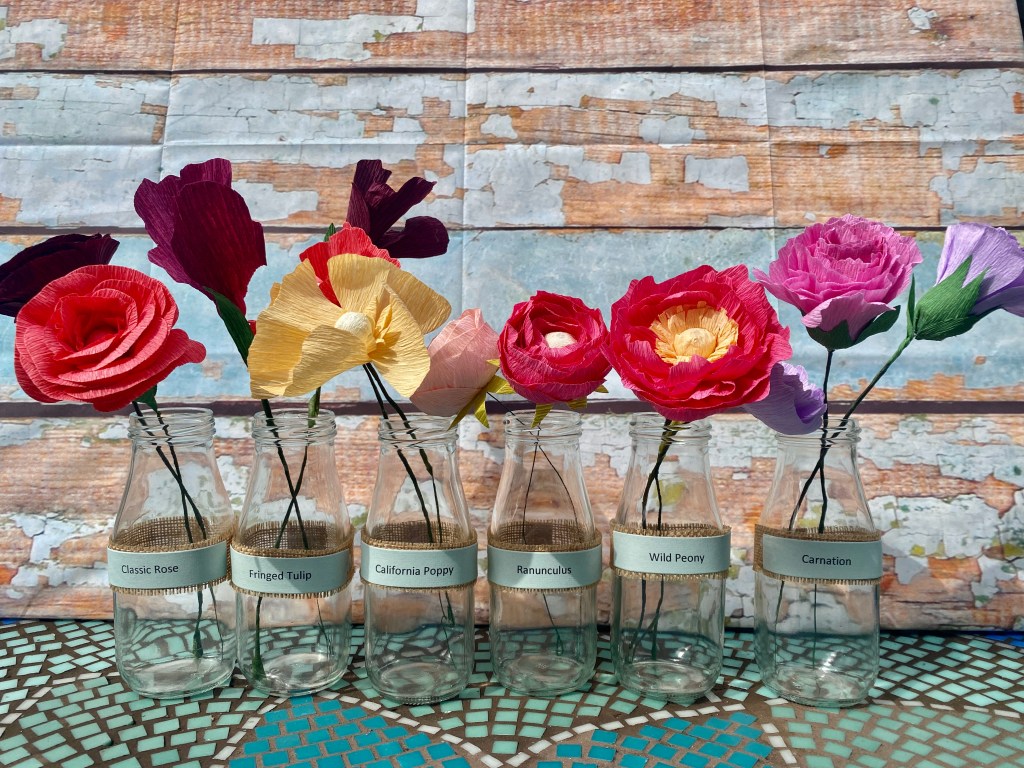
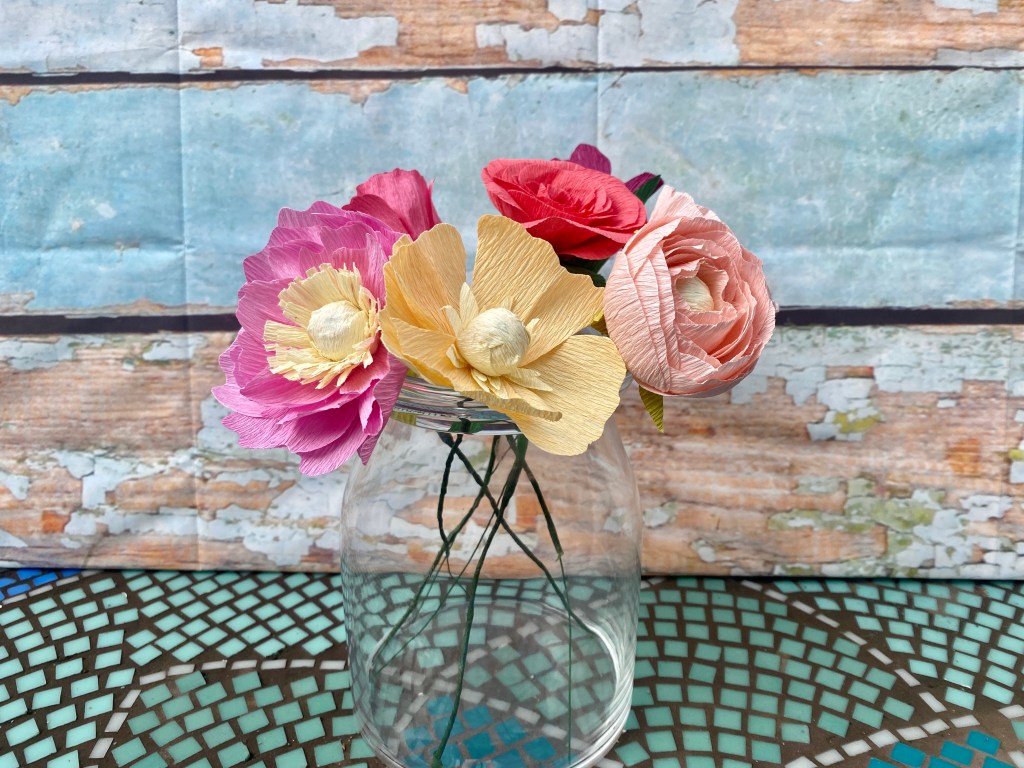
I’m back at Create and Craft for the next couple of days launching these fabulous flower dies and crepe paper collection. I’ve never really made crepe paper flowers before and was really surprised how easy they were, and how much you can shape the crepe paper to create really realistic petals. It’s obviously personal preference as to how many of each petal layer you cut, and how you shape them, but I thought it might be helpful for anyone buying these if I list out exactly how I put mine together, then you can use that as a starting point.
Fringed Tulip
For the Fringed Tulips, I used – 3 of the centre pieces, 1 of each petal, 2 leaves. This is one of the easiest to put together.
California Poppy
For the California Poppy I used; 1 each of all of the dies. Again this is a very simple one to put together.
Wild Peony
For the Wild Peony, I used; 4 of the fringe die, 4 of the double petal die, 6-8 of the small petal, and 6 of the large petal.
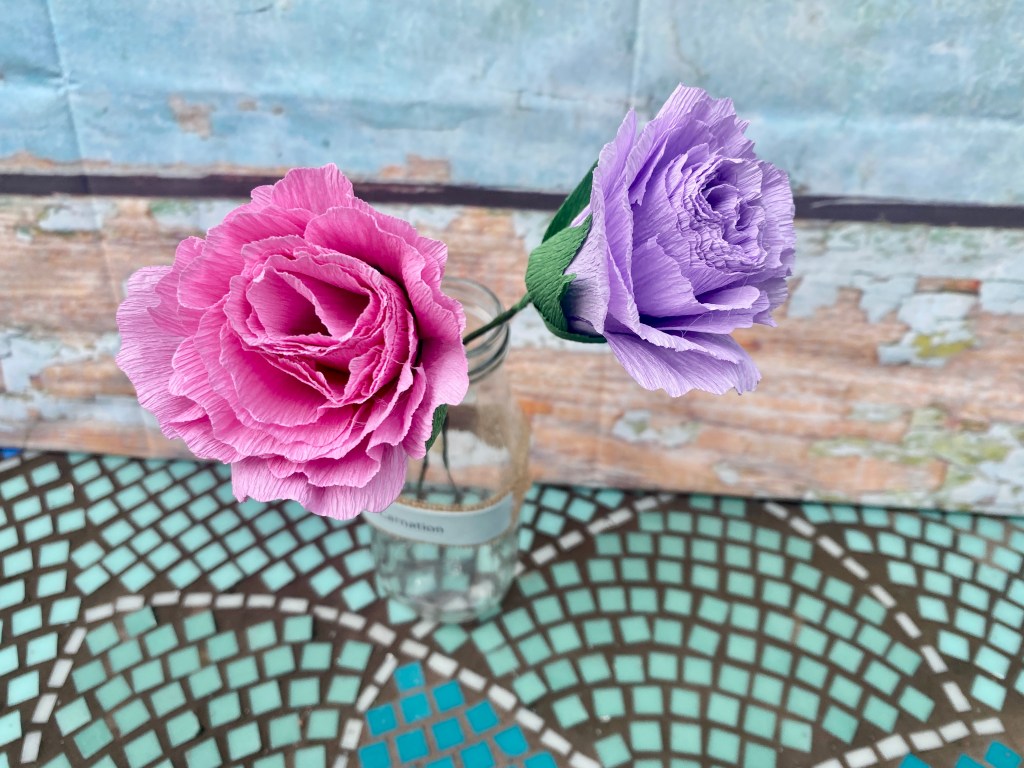
Carnation
For the Carnation I used; 4 of the strip die, 10 individual petals 1 green piece for the bottom, 1 or 2 leaves.
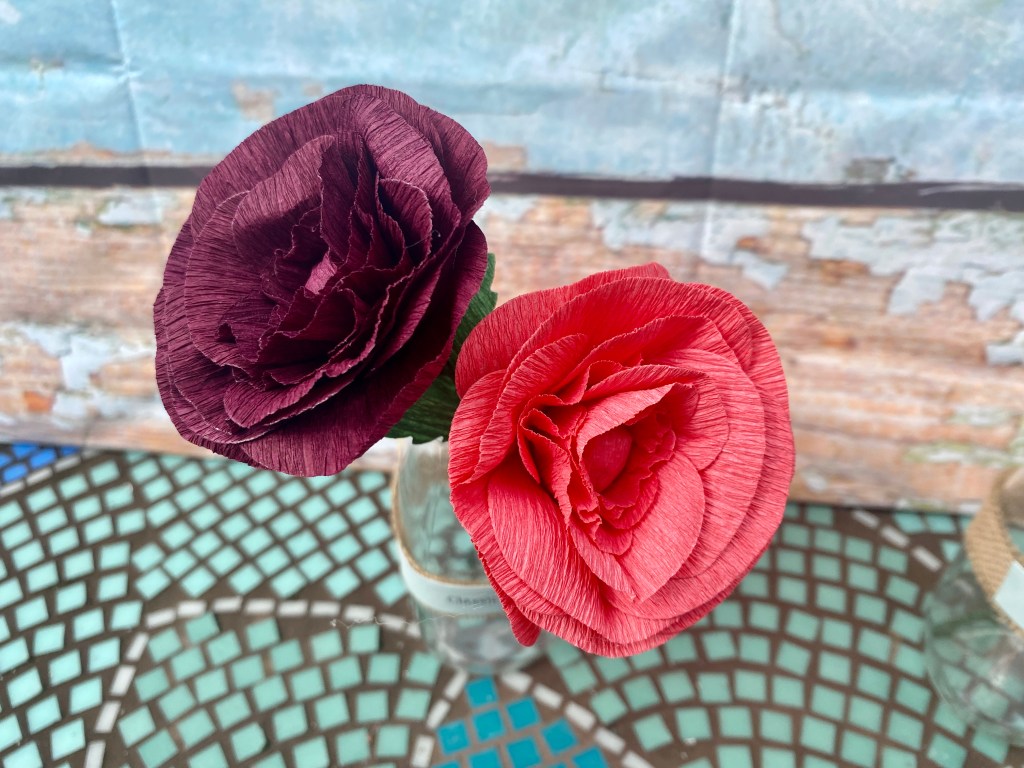
Classic Rose
For the Classic Rose I used; 4-6 of the smallest petal, 8 medium petals, 10 large petals, then the green piece for the bottom and the 2 leaves.
Ranunculus
For the Ranunculus I used; 6 of the small ovals, 10 of the medium and 15 of the large ovals, one green piece for the bottom and 1 or 2 leaves. I would say this flower is the most difficult and time consuming, as you do need to shape the petals in a nice cup shape the get a realistic flower, and this one also used the most petals, so takes a little longer. Saying that, I think this one is my favourite of them all.
I do plan to do a video later this week after the shows to demonstrate properly how to shape the petals, cover the beads etc., so hopefully that video will be ready by the time you get your dies if you order them from the show 🙂