I thought I’d share the cards I showed on my Hobbymaker TV shows last night, it seems odd sharing them after the show, when usually I share everything beforehand in the hope you’ll tune in for the show – but of course, this one had to be kept a secret until Tim made his reveal, and my show was literally straight after that!
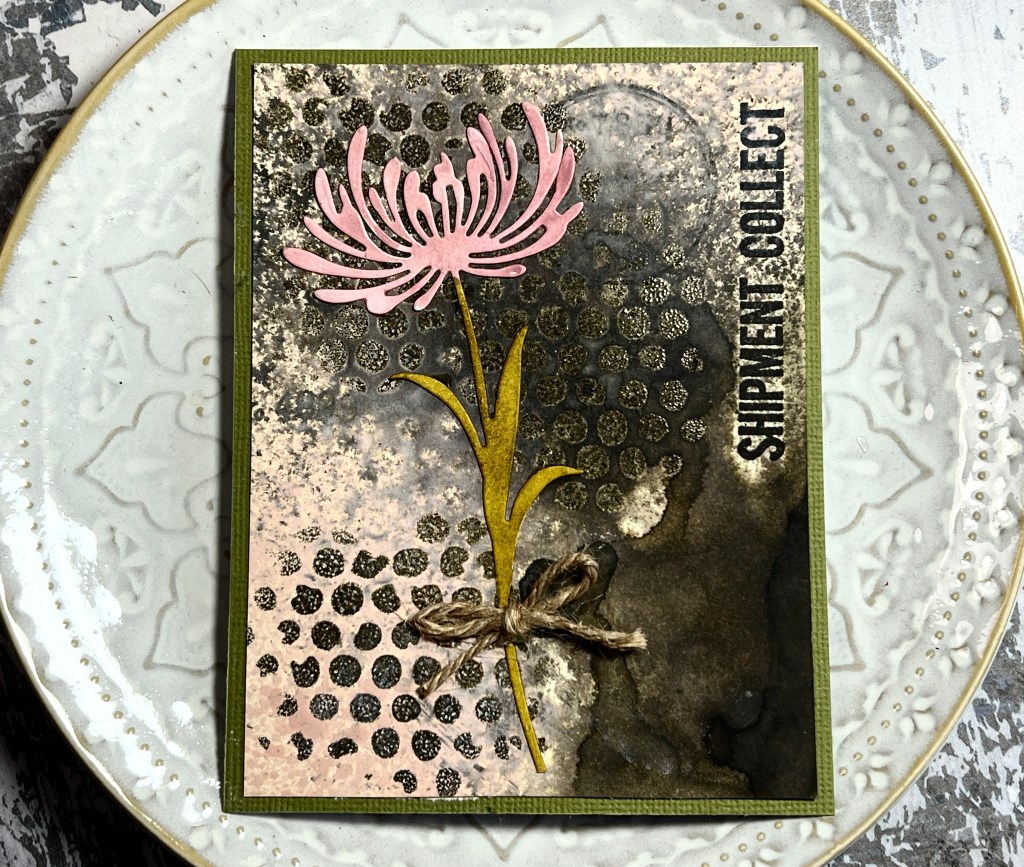
This first card used the Sizzix Foundry embossing folder, and I mixed the new Scorched Timber with a little bit of Salvaged Patina, and some Foundry wax in bronze to create the effect of rusty metal.
I really like this new colour, it’s the perfect dark colour that I would use instead of black when I wanted some real definition or shadow.
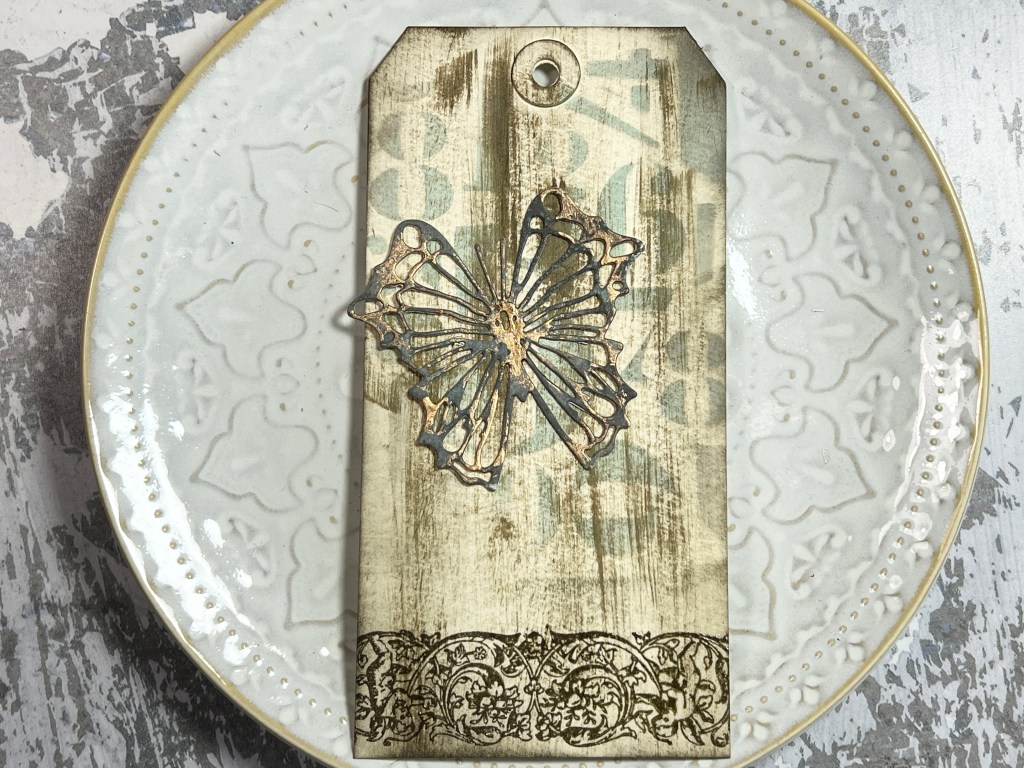
This card uses my all time favourite embossing folder, Lumber. As soon as I saw this new colour I was delighted for the possibilities of creating realistic wood backgrounds, and it really didn’t disappoint. How fabulous does this wood effect look?
I used some Sizzix Dimensional paste through a stencil then poured some of the Scorched Timber embossing glaze on top before heating with my heat tool to melt the powder, I like the shiny effect against the wood.
Having this last colour has really made me want to organise my craft room supplies, and perhaps get some extra shelving. I really want all my Distress products together in one area (in rainbow order of course). So watch this space, because as soon as I get time to do that, I’m going to start re-arranging things!
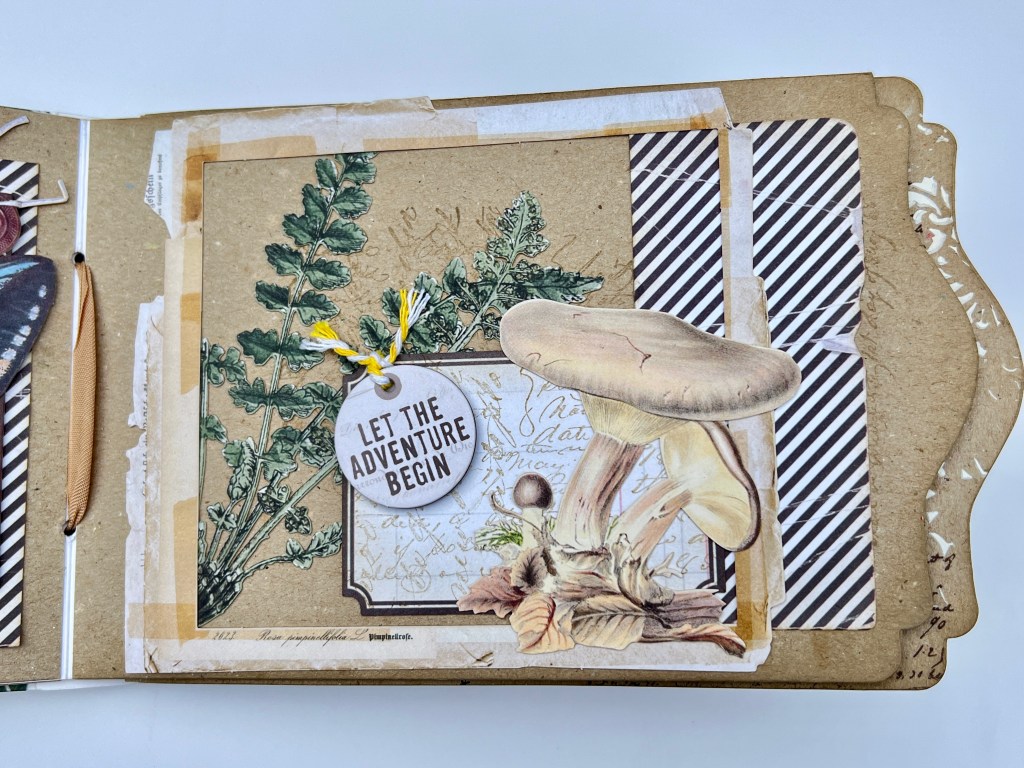
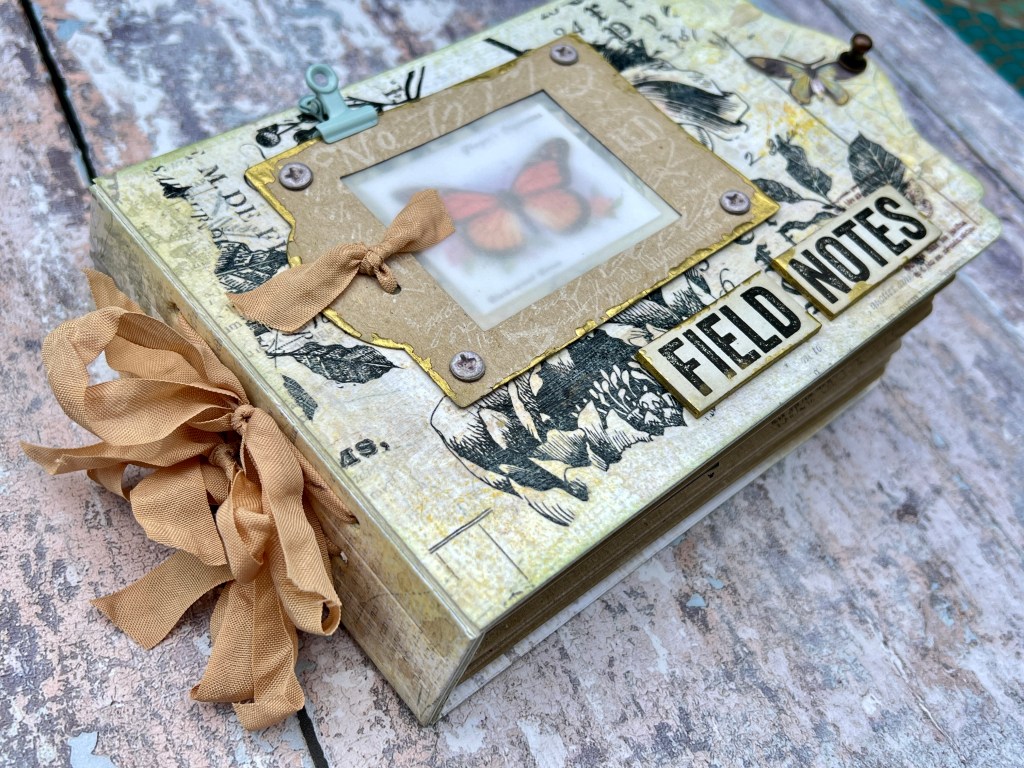
I can’t tell you how obsessed I am with this new journal die from Eileen Hull. I love all her journals, but this one is now my favourite. I really like the design, and the landscape format (of course you could flip it to have a top folding notebook if you prefer).
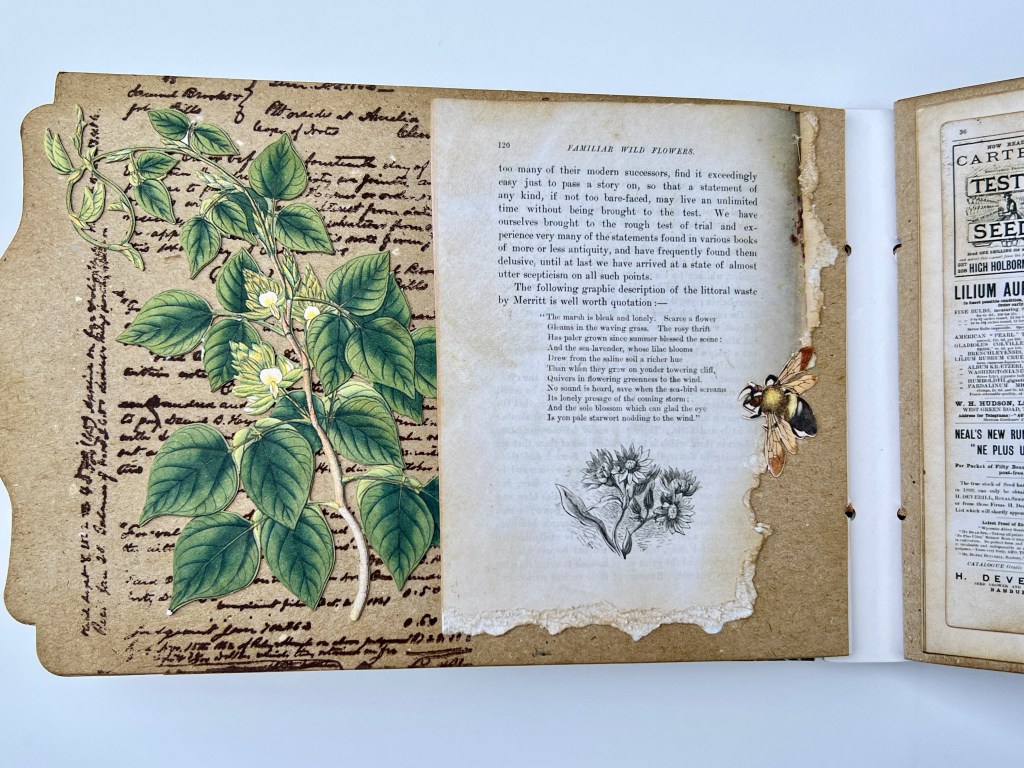
When mine arrived, I instantly knew I wanted to create a journal following the Field Notes theme, full of botanicals and butterflies, and incorporating so many of my older stamp and die sets.
I’m warning you now – this blog post has a LOT of photos. I went totally overboard with this one – I couldn’t put it down for nearly a week, and even now, I feel I’d like to go back and add some more to it!
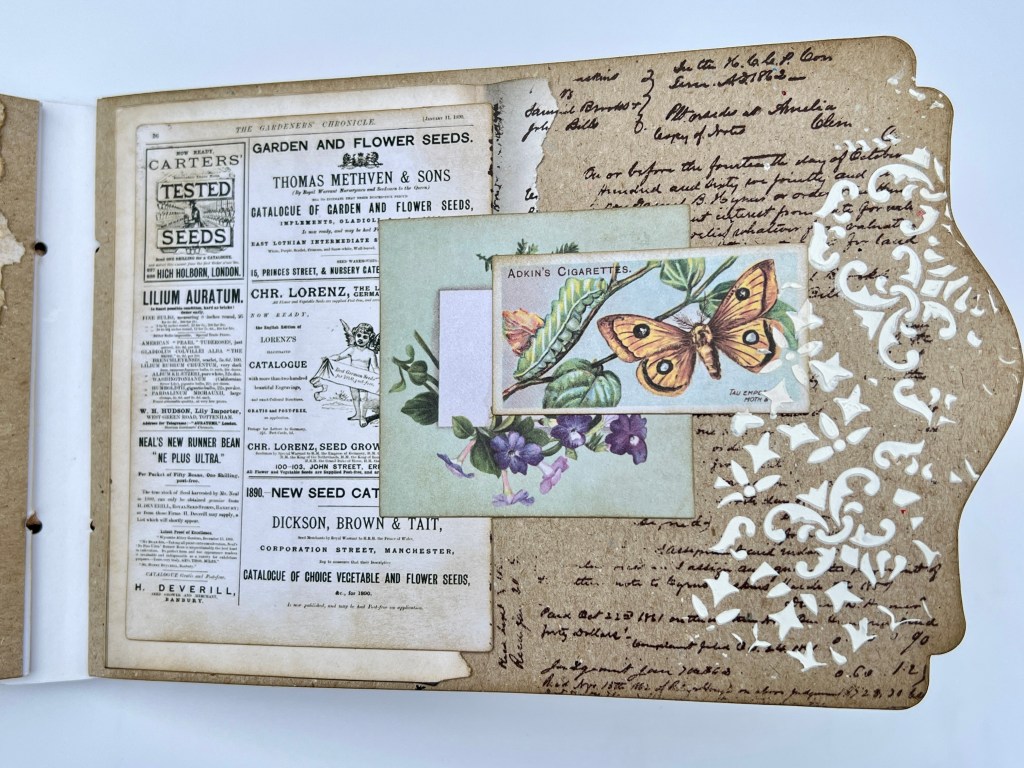
So on the front cover, I used the frame that comes with the journal and added some vellum behind it, then a little butterfly cigarette card. The papers I used throughout the journal are from 49 & Market, and I also added some Tim Holtz collage paper and chipboard sentiment.
Inside the front cover, more 49 & Market papers, together with the little folder from the Envelope, Folder & Flowers die set. The stamps are Aall & Create, and I added a few little bits of ephemera into the folder.
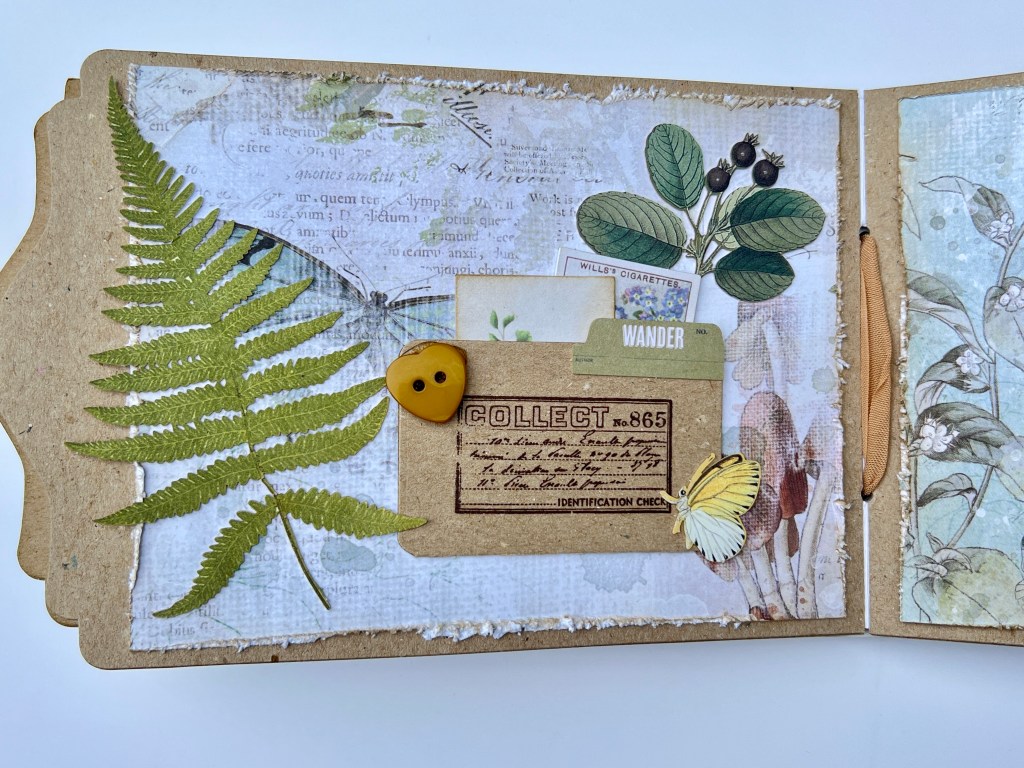
For the pages inside the journal I used the journal die to create pages that had the same shape as the journal. I created a little hinge from cream card, then sandwiched that between two sheets of kraft card so that my pages were nice and sturdy and could take the weight of all the layers.
I had great fun rummaging through my boxes of ephemera that I’ve collected over the years, and it felt good to actually use some of it (I’m terrible at hoarding nice things!). I had bought some chipboard elements to match the 49 & Market papers, and I had a lot of Tim Holtz ephemera and they all worked so well together.
This little folder is from the Tim Holtz Specimen die set – the elements in that collection work so well with this journal.
The flower here is from the Folder, envelope and flower die set, along with a 49 & Market frame.
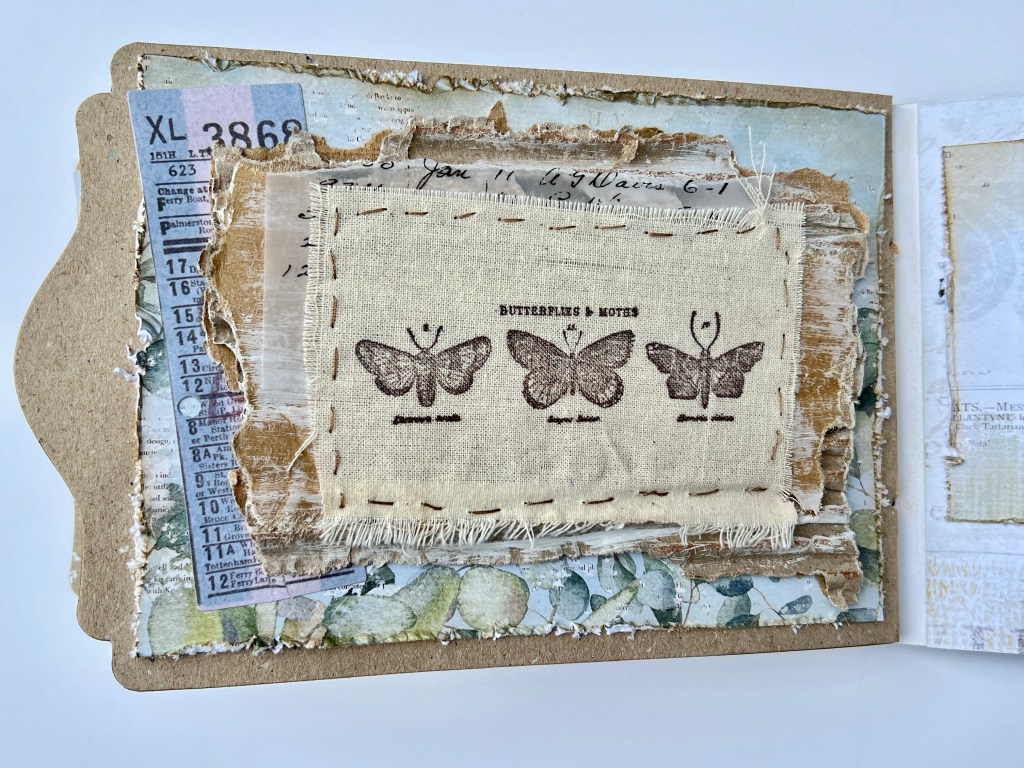
I even did a little bit of stitching! I stamped the butterflies on a scrap of fabric, then took a piece of cardboard box, dry brushed some gesso on it, then stitched the fabric to it before attaching it to the page. I love how it turned out.
For the back of the journal I used the same collage papers as the front, then a fern and butterfly from the 49 & Market collection.
I punched holes in the pages so that I could attach them to the journal with seam binding (I used cream seam binding and soaked it in tea to give this lovely vintage colour). I also added a little metal hardware piece (Tim Holtz).
Hope you’ve enjoyed seeing this journal. I really enjoyed making it and can’t wait to do more (I’ve been scouring antique shops for old botanical books and ephemera so watch this space!)
I’m at Create and Craft TV this Friday with some of my favourite Tim Holtz dies. I obviously love the floral dies, as florals are always my faves, but the bold sentiments are so great to work with them – or for quick cards with a nice bold sentiment, I just love them.
I made this lovely framed piece recently for a Facebook live, so thought I’d share some instructions on making it.
I used the largest frame die from the Shadow Box #2 set for the frame, and cut it four times to make a square.
This frame measures 15.5cm x 15.5cm, so I cut a piece of kraft card that size for the backing, then added some pale aqua card to the front.
I then used a Tim Holtz stencil (THS004) to add some uneven stripes with Sizzix Texture paste. I then added some Prima Sparks acrylic paint on top, in a rainbow. For the rest of the background I did a little bit of stamping in brown ink (Tim Holtz Papillon and Studio Light Jenine’s Mindful Art Collection). Once the ink had dried I dry-brushed some gesso on the background.
To create a little ledge for the houses, I cut two strips of mat board and stuck them back to back, then covered with a piece of frayed burlap. I cut the houses from kraft card and backed them with some patterned paper and an old book page. I added them with foam pads to give a bit of dimension.
I then dry-brushed some gesso on the frame, on the front and sides, then added some Tim Holtz Crackle Texture paste with a spatula and set aside to dry.
Thanks for popping by today, I’ll list below the main products used.
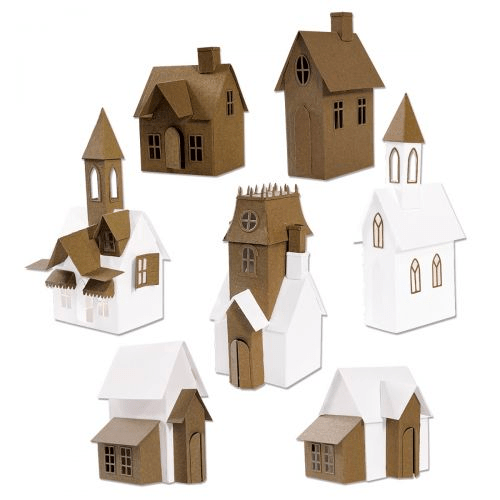
I’m on Create and Craft TV today with this amazing collection of dies, so wanted to do a blog post so I can put all the relevant information here for those getting the dies.
So first things first. There are a lot of dies in the set (87!), so before you start making your village you will want to get these into some sort of order.
Zoe Hillman (who is one of the Makers on Tim Holtz’ team), came up with a great solution. Here is a link to her blog post with photos of her solution. She used some thick card covered with magnetic sheet for hers, I had some of the Sizzix magnetic storage sheets which are already really thick, I’ll put a link at the end of this post to the Sizzix solution in case you want a ready-made solution.
I’d suggest following Zoe’s format for how to group the dies because it’s really logical. Here are a few of my sheets:
I used a white Posca pen to add the names (as suggested by Zoe). All the dies are etched on the reverse with the names (except for the tiny ones), so it’s quite easy to work out where to put them.
So now you have your dies in a logical order, it’s time to start creating, and I have a few hints and tips to share. Firstly, the type of card to use. I used 270gsm kraft card for my houses, and I found that worked pretty well, as well as being a good base colour. A very helpful tip that I gleaned from Tim’s live – link here, is to use a small acrylic block with a straight edge to fold your crease lines against. I found that, especially with the kraft card which is quite fibrous, my crease lines didn’t crease straight without doing this, so it’s a very useful tip.
For die cutting, the Sizzix sticky grids will make your life so much easier so I’d highly recommend getting some. You can use masking tape to hold your dies in the same position but that’s not always guaranteed to hold them, and also the grid lines on the sticky grid really help make sure you have your window and doors straight.
The key thing here is to LEAVE your dies on the grid once you cut out your house. Then you can go back and cut again and know the windows will line up – so if say, you cut your house from kraft card, then want to add cladding to the house from embossed watercolour card (more on the embossing folders in a bit), then you can cut another die cut from watercolour card, snip off the tabs, then emboss, colour, then add to the house. As you can see, I actually used two cutting pads covered with grid so I could keep both houses on them.
In terms of best adhesives to use, I’d recommend a combination. I used red line tape for the tabs on the house itself, because those are quite easy to assemble. However, over time, any type of tape adhesive might come unstuck, and of course, if you are building a village, it’s likely to be something you plan to keep for a good few years, so where it’s easy to do so, I’d run a line of hot glue over the join (on the inside). Of course where you are adding layers of mediums or more card you will be strengthening the structure even more so there’s no reason why these shouldn’t hold up pretty well.
For window frames, cladding etc. I used a PVA glue, and for things like the chimney stacks where it was a little fiddly, I used hot glue. You definitely want a hot glue gun with a fine nozzle (like the Sizzix one), because you don’t want lumpy glue showing.
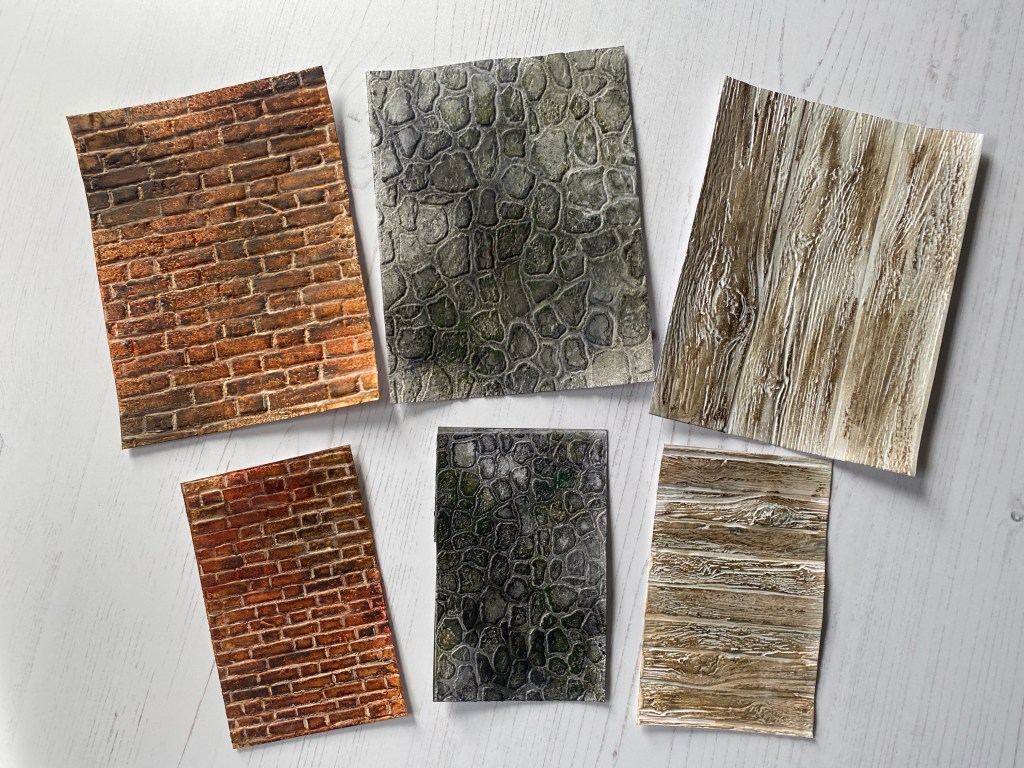
There are also 3 embossing folders designed to work well with this collection, and they are miniature versions of previous embossing folders – Brickwork, Lumber and Cobblestone.
The realistic look you get with these is just mind blowing. If you are embossing panels for your house, make sure you die cut the house first, then cut off the tabs, then emboss (if you emboss then cut out the house shape you will squash your embossing a bit).
There are a lot of different colour options you can use on them to get different looks. Zoe has a good tutorial on her blog for the brickwork that’s worth looking at here.
I should also mention that there is a ton of inspiration and help on the Sizzix blog – Josh and Pete have a downloadable ebook showing how they make all their amazing projects, plus the video from Tim is there along with a video by Josh showing all the projects in the ebook.
Here’s the link to the Sizzix inspiration page for the Village Collection
I’ve got links below to all the products in case you missed the shows or didn’t get the dies then.
Affiliate links are used at no cost to you
Sizzix Big Shot Switch Plus Electric die cutting machine white Shop at: SSS | SZ | AZ | CS | SBC
Sizzix Big Shot Die Cutting machine Shop at: SSS | SZ | AZ | CS | SBC
Sizzix Big Shot Switch Plus Electric die cutting machine Tim Holtz Black Shop at: SSS | SZ | AZ | CS | SBC
Sizzix Big Shot Switch Plus Electric die cutting machine cherry blossom Shop at: SBC
I’m back at Create and Craft TV on Tuesday 22nd Feb with some of the new Tim Holtz Chapter One dies. Also on the shows, is the new Black Tim Holtz Foldaway machine.
This is the Bird & Egg Colorize set, and I have to say, it’s probably my favourite. I love the layered look you get on the bird, and how many options that gives you to add colour and shading.
Next is the Bunny Games set, not just for Easter, as these bunnies have a lovely quirky look to them so would work all year round.
Next up is this cute Papercut Chicks- love the way you have two facing in different directions so you can put together different scenes. Also, the grassy hill dies would work with so many other die sets.
Next is the fabulous new Colorize set Woodgrain – you can create 2 different wood planks with a very layered, realistic look. For this card I used one of them, together with the Funky Nature set and Intertwine embossing folder.
Just one more to share – you’ll have to watch to shows for the rest!
Affiliate links are used at no cost to you
Sizzix Big Shot Switch Plus Electric die cutting machine white Shop at: SSS | SZ | AZ | CS | SBC
Sizzix Big Shot Foldaway Tim Holtz Shop at: SSS | SZ | AZ | CS | SBC
I thought I’d have a scroll through my photos and pick out a few of my favourite projects from the past year. It’s been another fabulous year for me working for Sizzix, and I’ve been lucky enough to work with so many gorgeous products. The designers are Sizzix really are a talented bunch, and when I looked back through my photos it was hard to pick just nine photos.
The shows I did in the summer with the crepe paper flowers were a real highlight – having never made crepe paper flowers before this, I was amazed at how much fun it was.
Another highlight from the year was the Botanicals collection from Lisa Jones. Florals are always inspiring to me, and this collection features all my favourite colours. The whole range is beautiful, so this was another show I really enjoyed doing.
2021 was another fabulous year of releases from Eileen Hull. Her journals are some of my most-used dies, and she came out with two fabulous journals – the Folio Journal and the Full Size Journal, as well as some very clever dies to create extra elements such as a waterfall.
Happy New Year, and thank you for following me this year on all the various platforms. 2022 is going to be an exciting year for me. I am giving up my PA job to concentrate full-time on my crafting, so you will be seeing lots more of me – as well as doing more work with Sizzix, I’m planning to do lots more on my YouTube channel, I have so many ideas, and I can’t wait to have the time to put them into action!
I’ve listed below most of the products used on these projects in case you want to find them.
Affiliate links are used at no cost to you
Stampers Anonymous Papillon stamp set Shop at: SSS | AZ | CS | SBC
Sizzix Eileen Hull Full Size Journal Bigz Plus die Shop at: SSS | CS | SBC | CC
I’ve put together a new video to run through the new Eileen Hull journal, showing how to put it together and running through all the different extras you might need, along with how to add notebooks or your own signatures.
Affiliate links are used at no cost to you
Sizzix Big Shot Plus Die Cutting machine Shop at: SSS | SZ | AZ | CS | SBC | CC
Sizzix Surfaces Texture Roll Gold Shop at: SZ | CS | SBC | CC
Sizzix Surfaces Texture Roll Gray Shop at: SZ | CS | SBC | CC
Sizzix Surfaces Texture Roll Rose Gold Shop at: SZ | CS | SBC
Sizzix Surfaces Texture Roll Silver Shop at: SZ | CS | SBC | CC
Sizzix Surfaces Texture Roll Tan Shop at: SZ | CS | SBC | CC
Sizzix Surfaces Texture Roll White Shop at: SZ | CS | SBC | CC
Sizzix Eileen Hull Full Size Journal Bigz Plus die Shop at: SSS | SZ | CS | SBC | CC
Sizzix Eileen Hull Sweater 3D embossing folder Shop at: SSS | SZ | CS | SBC | CC